Guest/Play Room Update
Added a new rug! Small update, but so gorgeous I had to share!


Rug is from Mark and Day, and I LOVE their selection and prices! Highly recommend! AND, you can use that link and save 10% 😍
Wall hangings, shelves and a couch coming soon…
Plus, a total gut of our mudroom in process to share soon! 😉
Jess
XX
Quick and Easy Valentine’s DIY
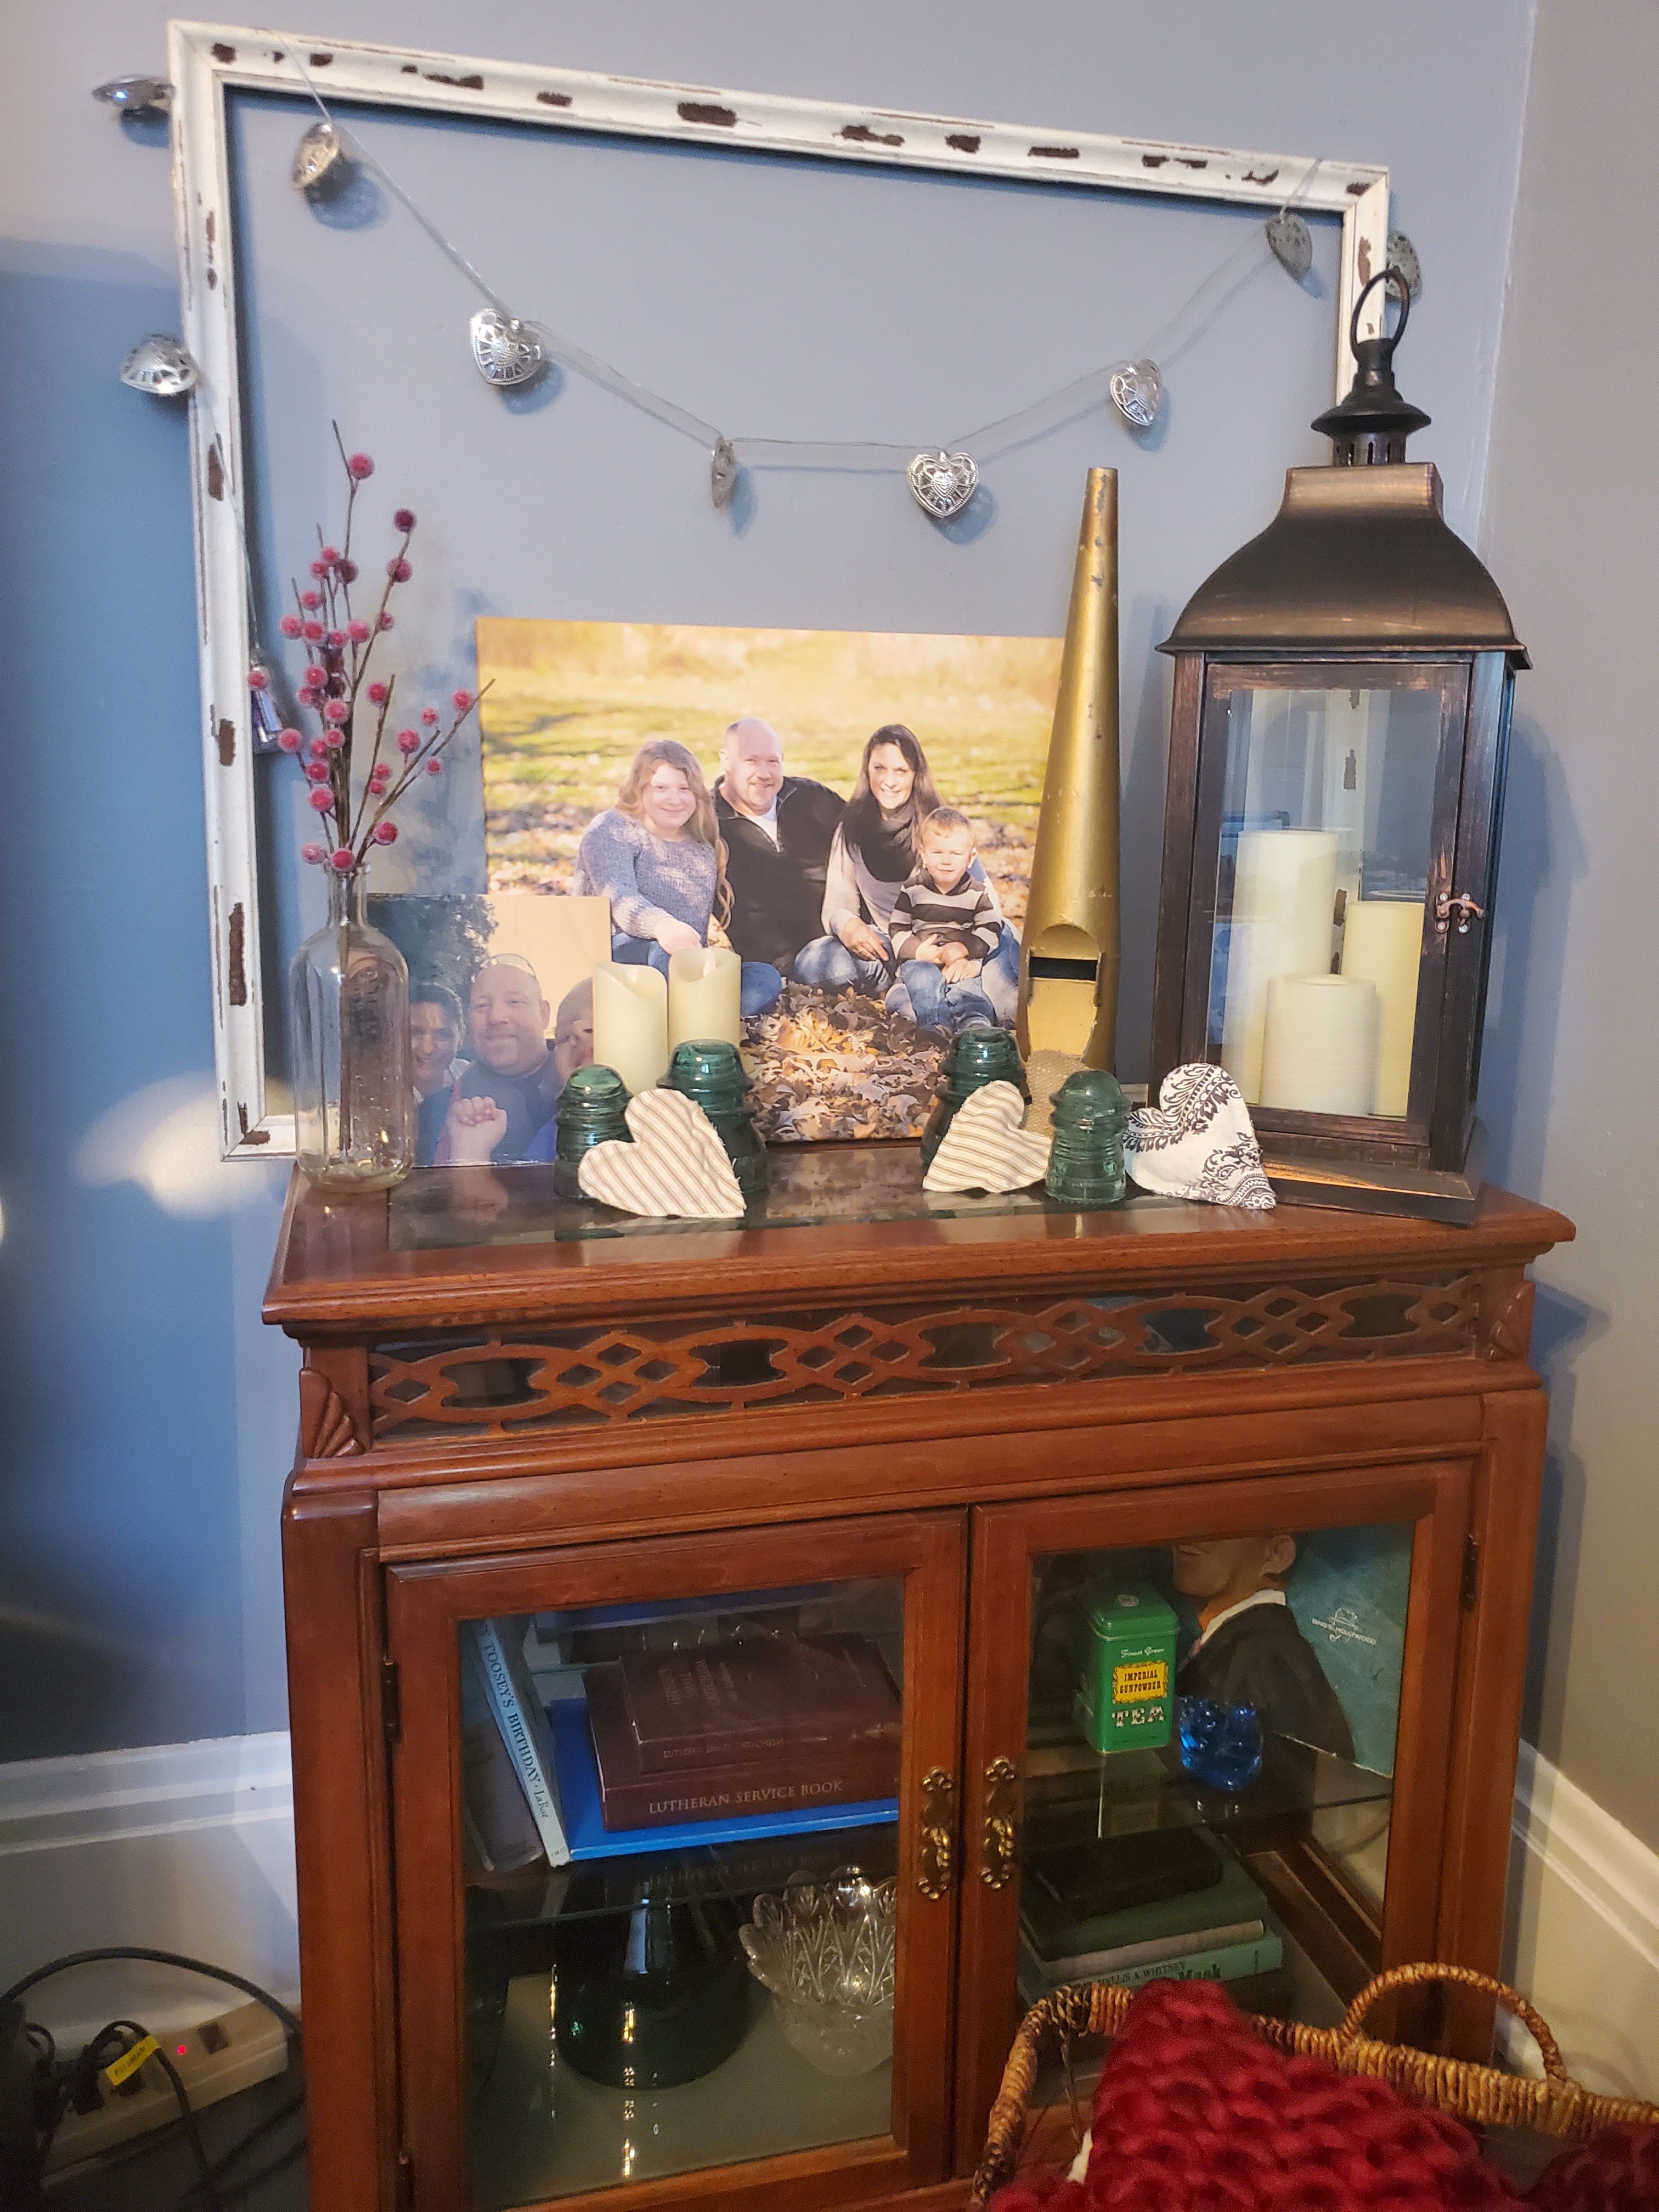
I made these fabric hearts last year and loved them so much I put them out again this year!


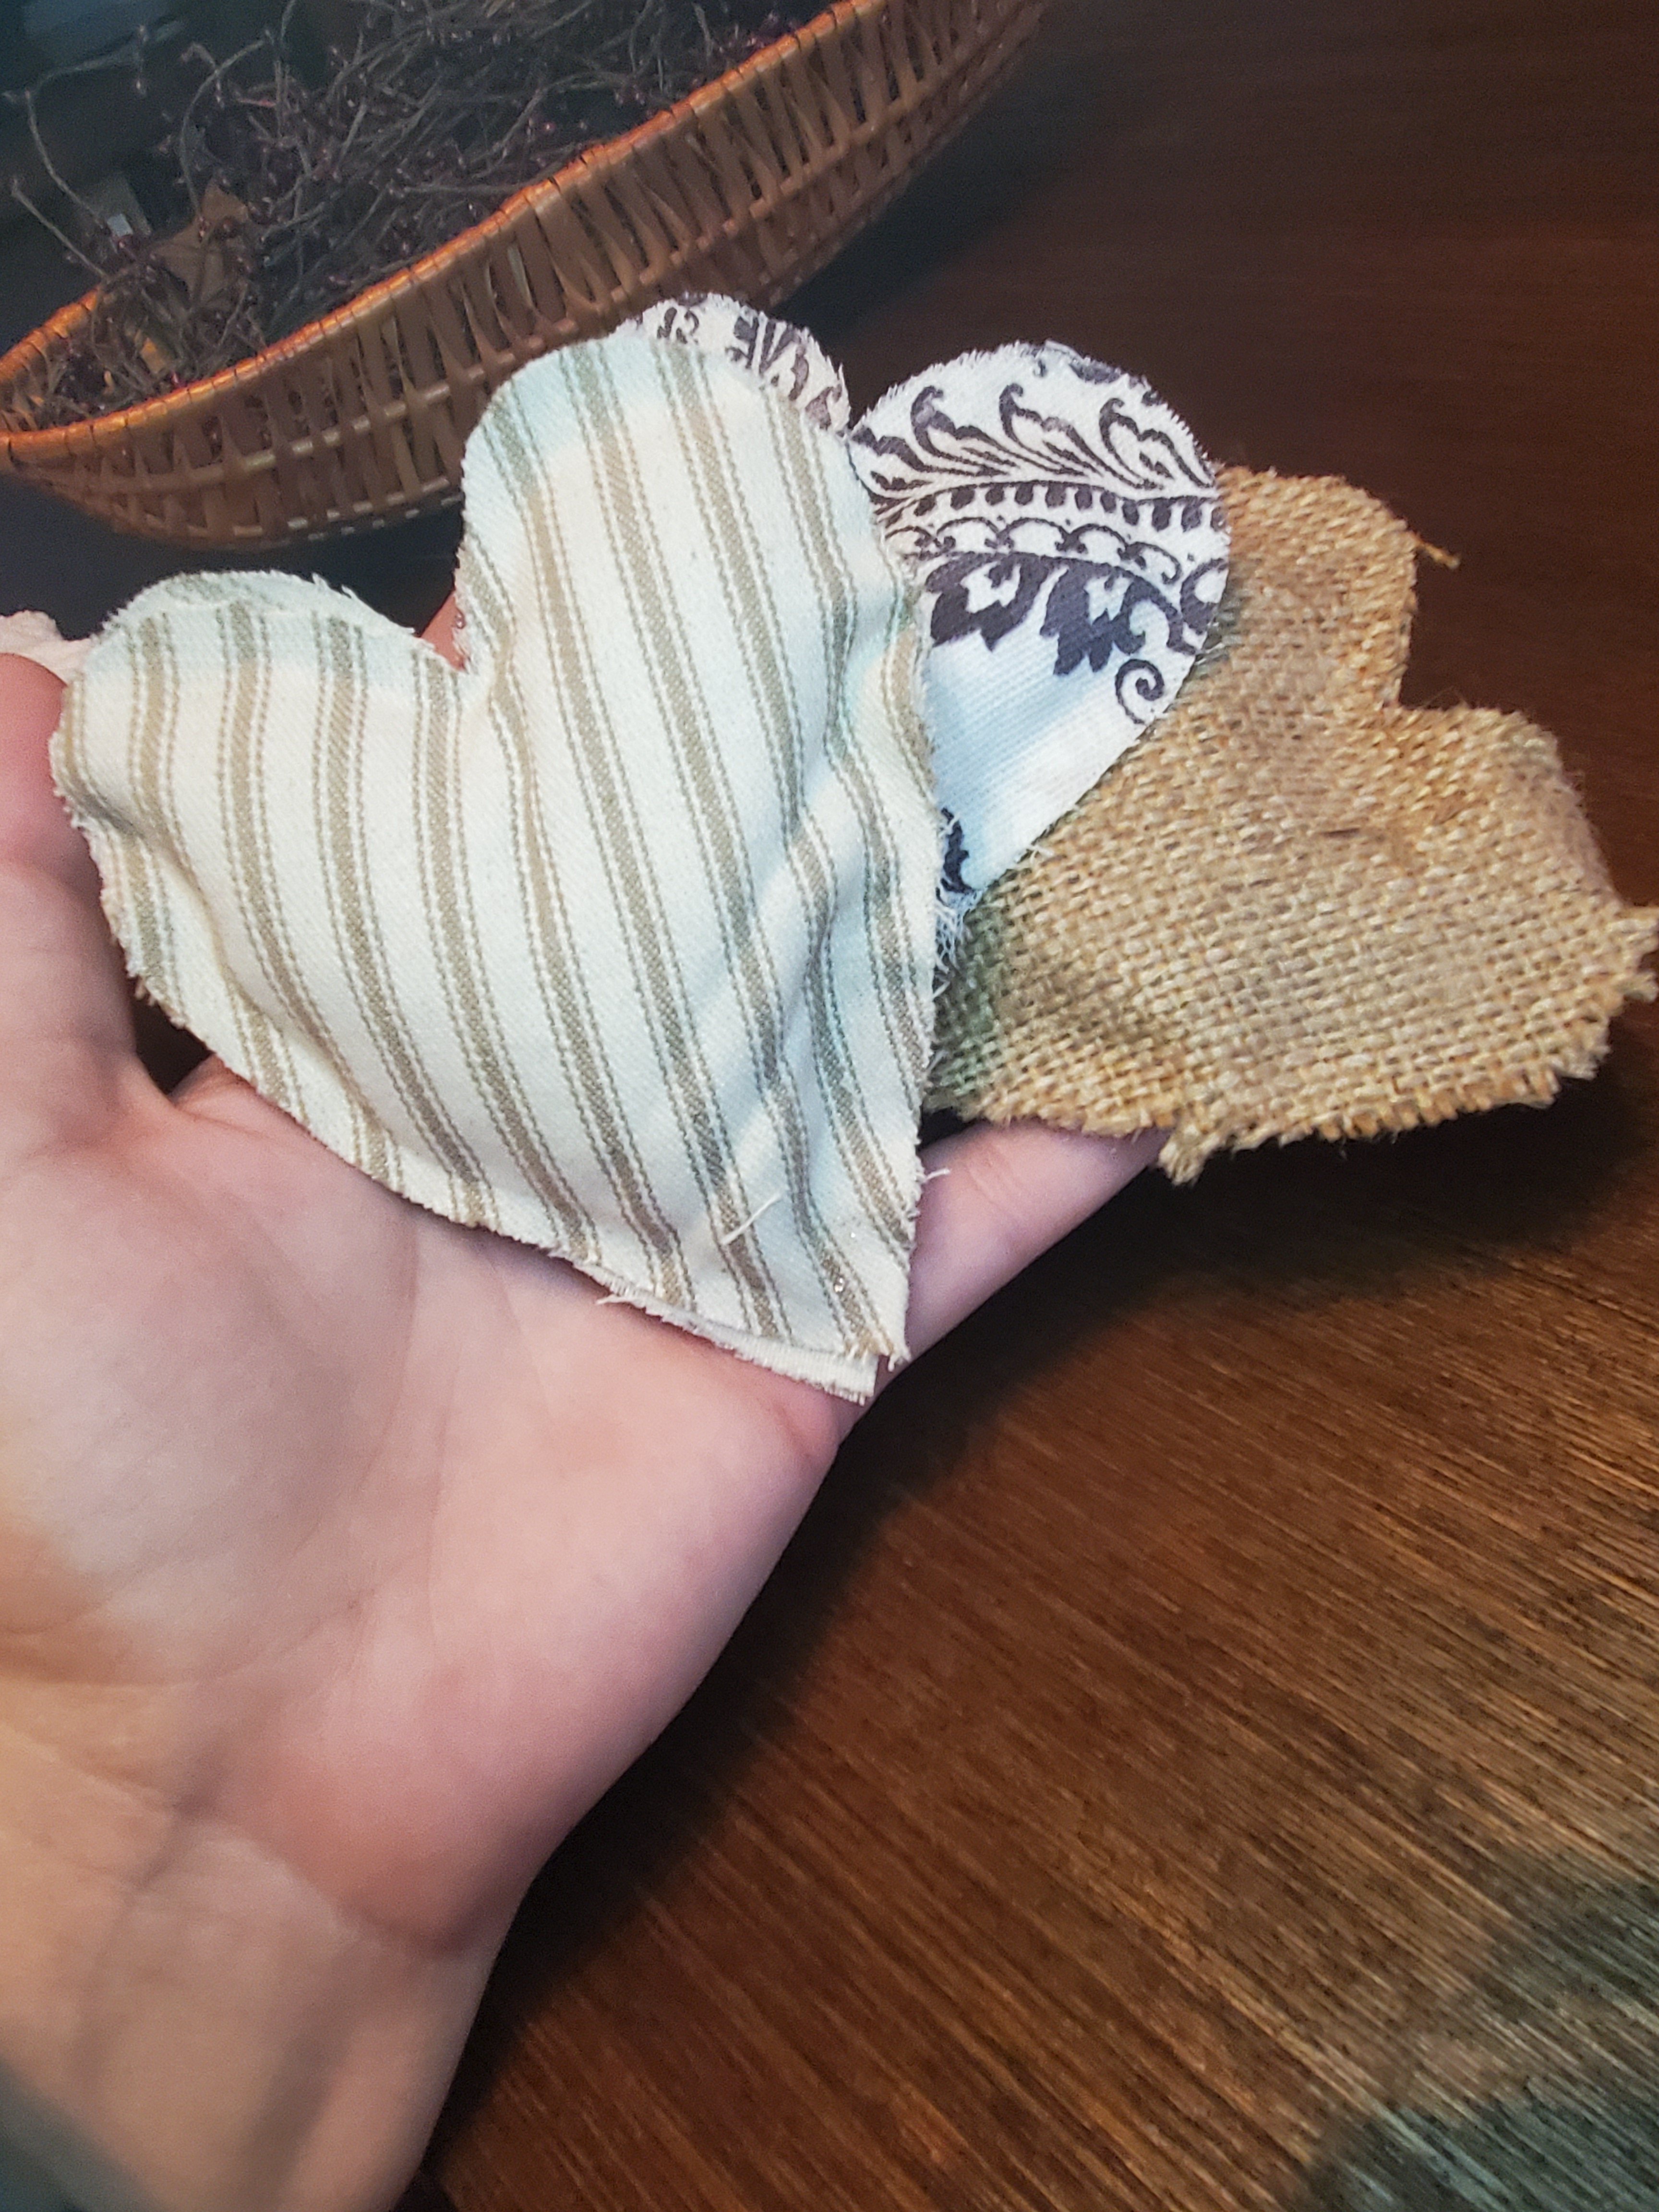
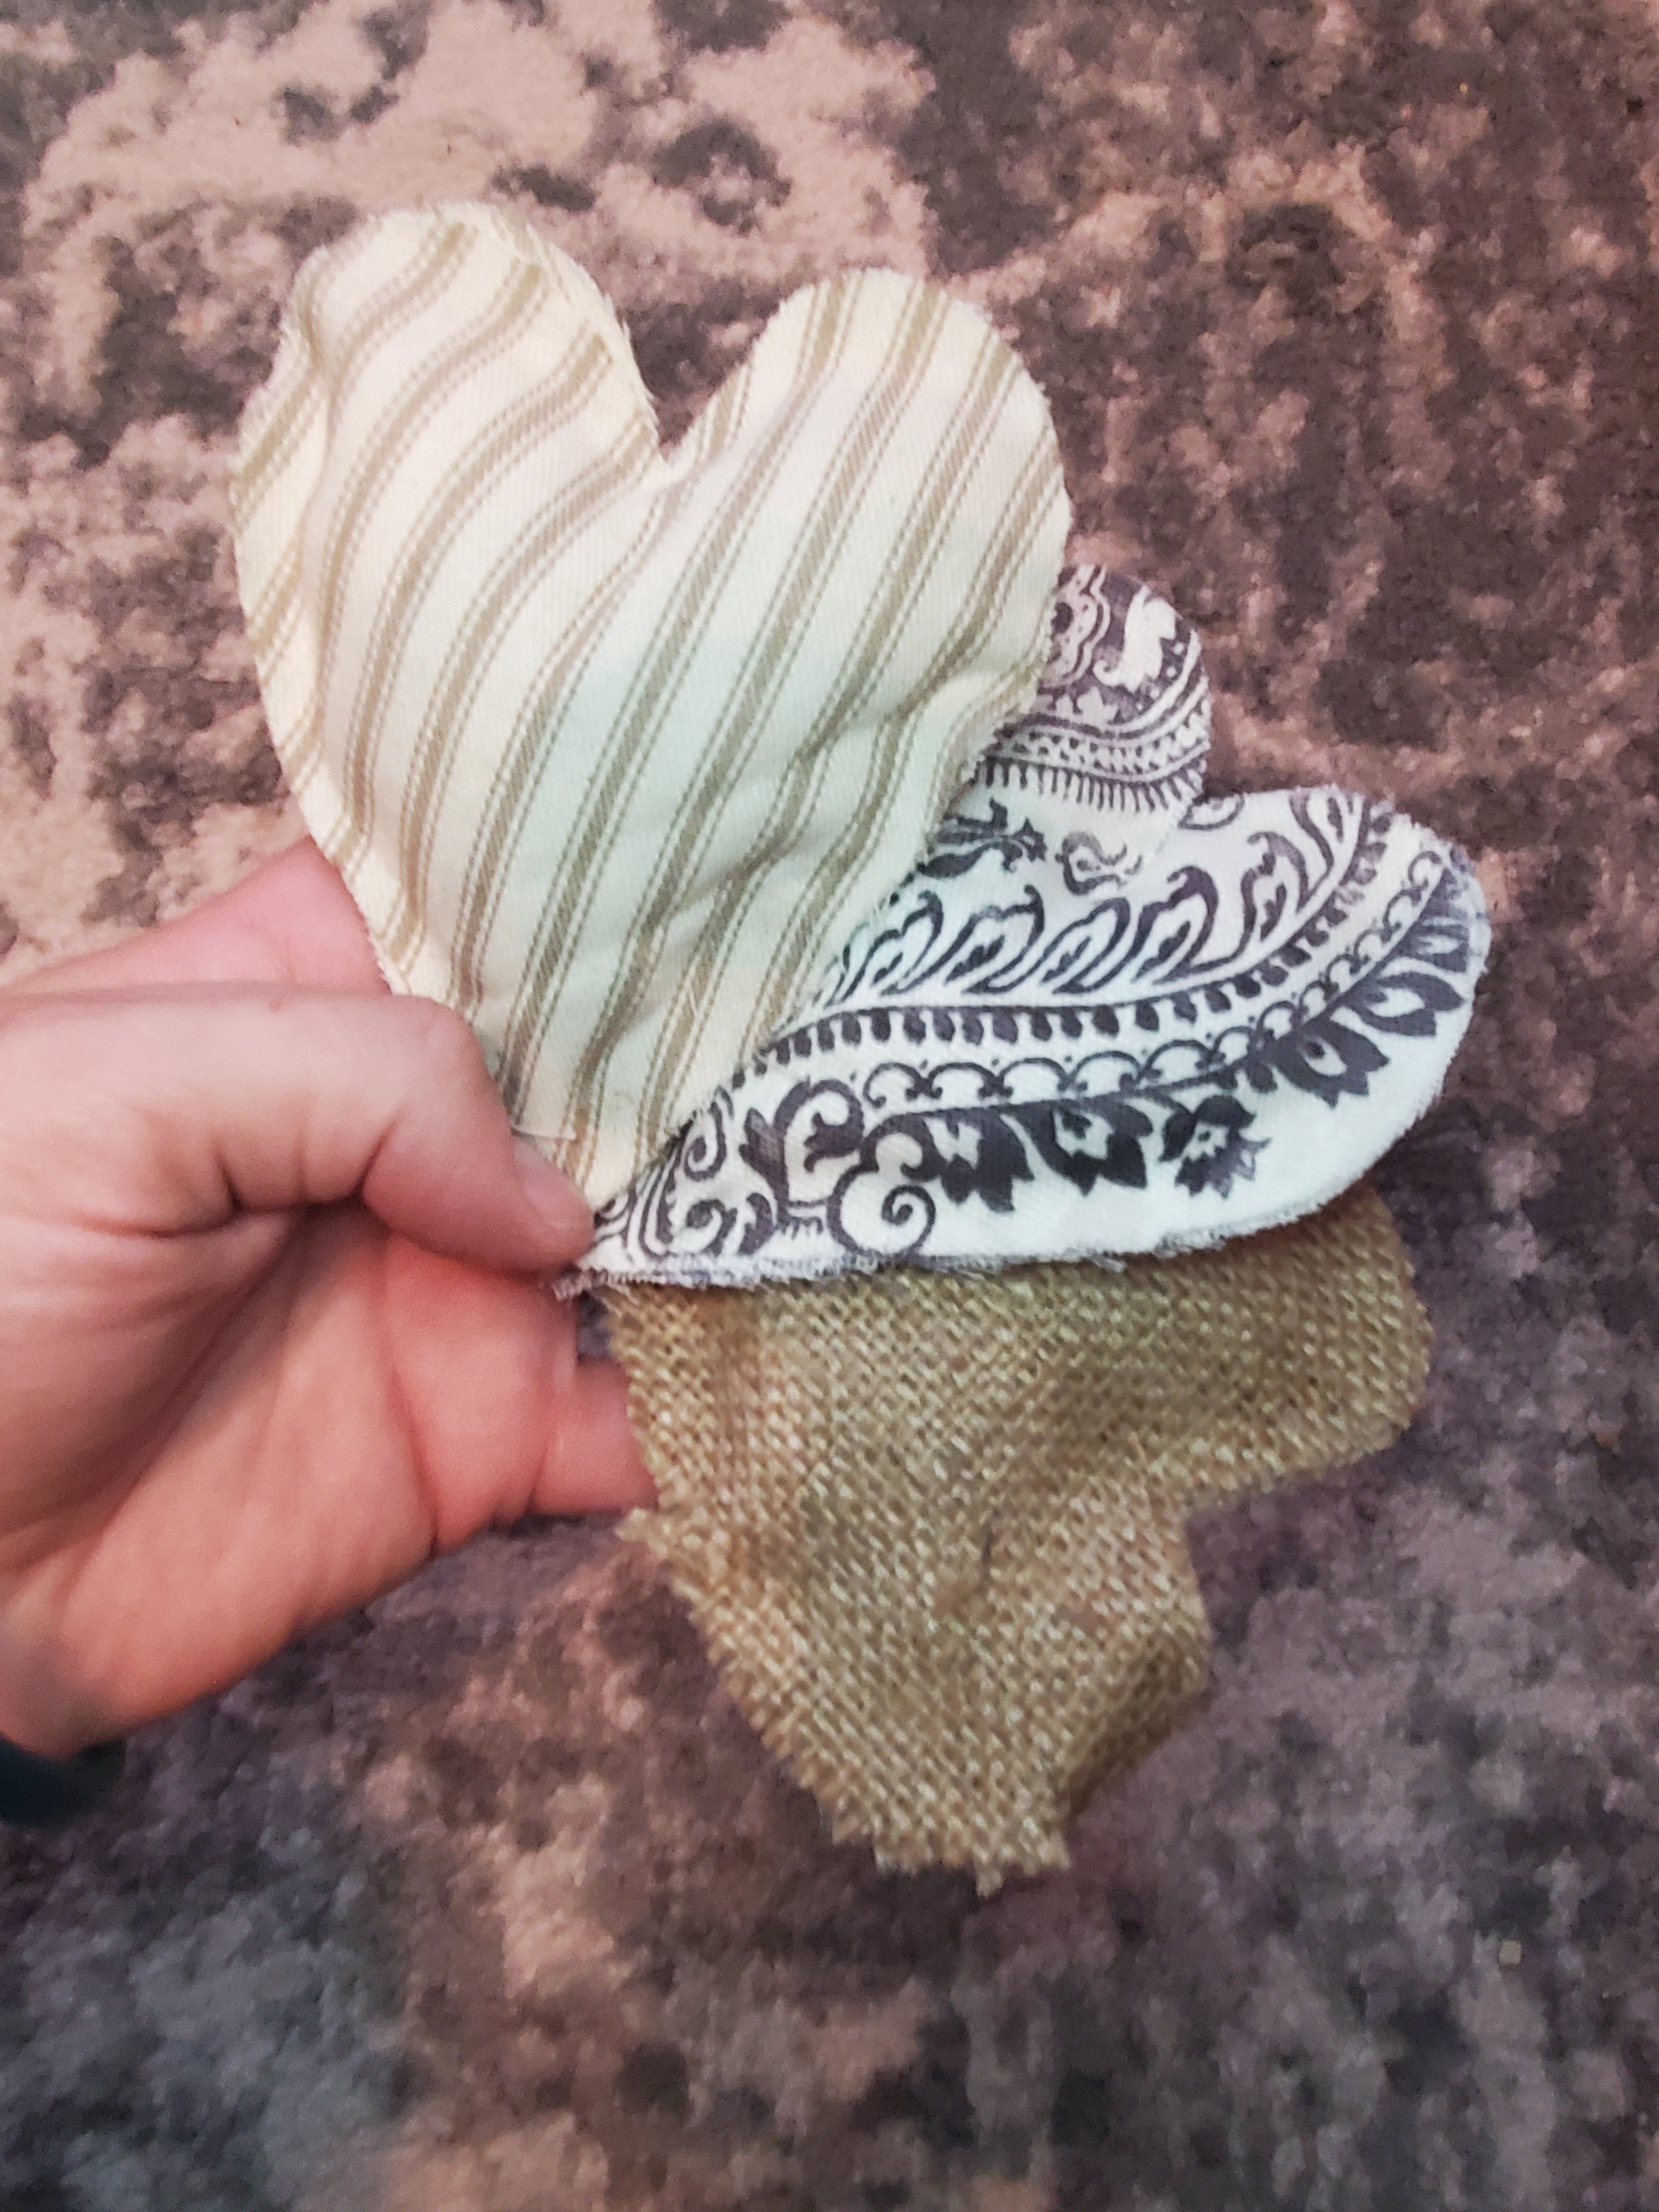
It’s so simple that it doesn’t require much instruction, but a fun project for anyone because there are so many possibilities! I used scrap fabric that I had on hand, making this super inexpensive too! I picked a couple fabrics that complimented one another and had a rustic vibe. You could use anything at all! The only other supplies you need are liquid stitch (always handy to have a tube on hand!) and some stuffing. You can get both of these at your local craft store or a Walmart. The stuffing sold here at our Walmart was in too large of a bag and I knew I didn’t want a ton. So, quick fix was to buy a small pillow insert at Walmart. This was about $4 and I have plenty left for more projects.

Start by drawing a heart on cardboard. Try a cereal or cracker box! Then trace this heart onto the backside of your fabric. Do sets of two hearts in matching fabric. Then run a bead of the fabric glue around the heart. Leave a few inches unglued. I left a quarter inch or so around the edge. I used a few binder clips to hold these while drying. You could also set a book on them. When they are dry, stuff fabric into them. Doing it in this order allows you to fill them full and puffy without ungluing. Now add glue to the last few inches and clip to dry. You could always add sequins, embellishments, ribbon, or any extras too.

The other little white heart was super simple too. I used a cardboard hear, made little cuts around the outside, and wrapped yard around the heart. The cuts helps hold the yarn in place for the first layer of wrapping. Wrap all different directions. Glue with the fabric glue. Simple!

Viola! Hope you enjoy this quick and easy project!
Xx,
Jess
Permalink Comments Off on Quick and Easy Valentine’s DIY
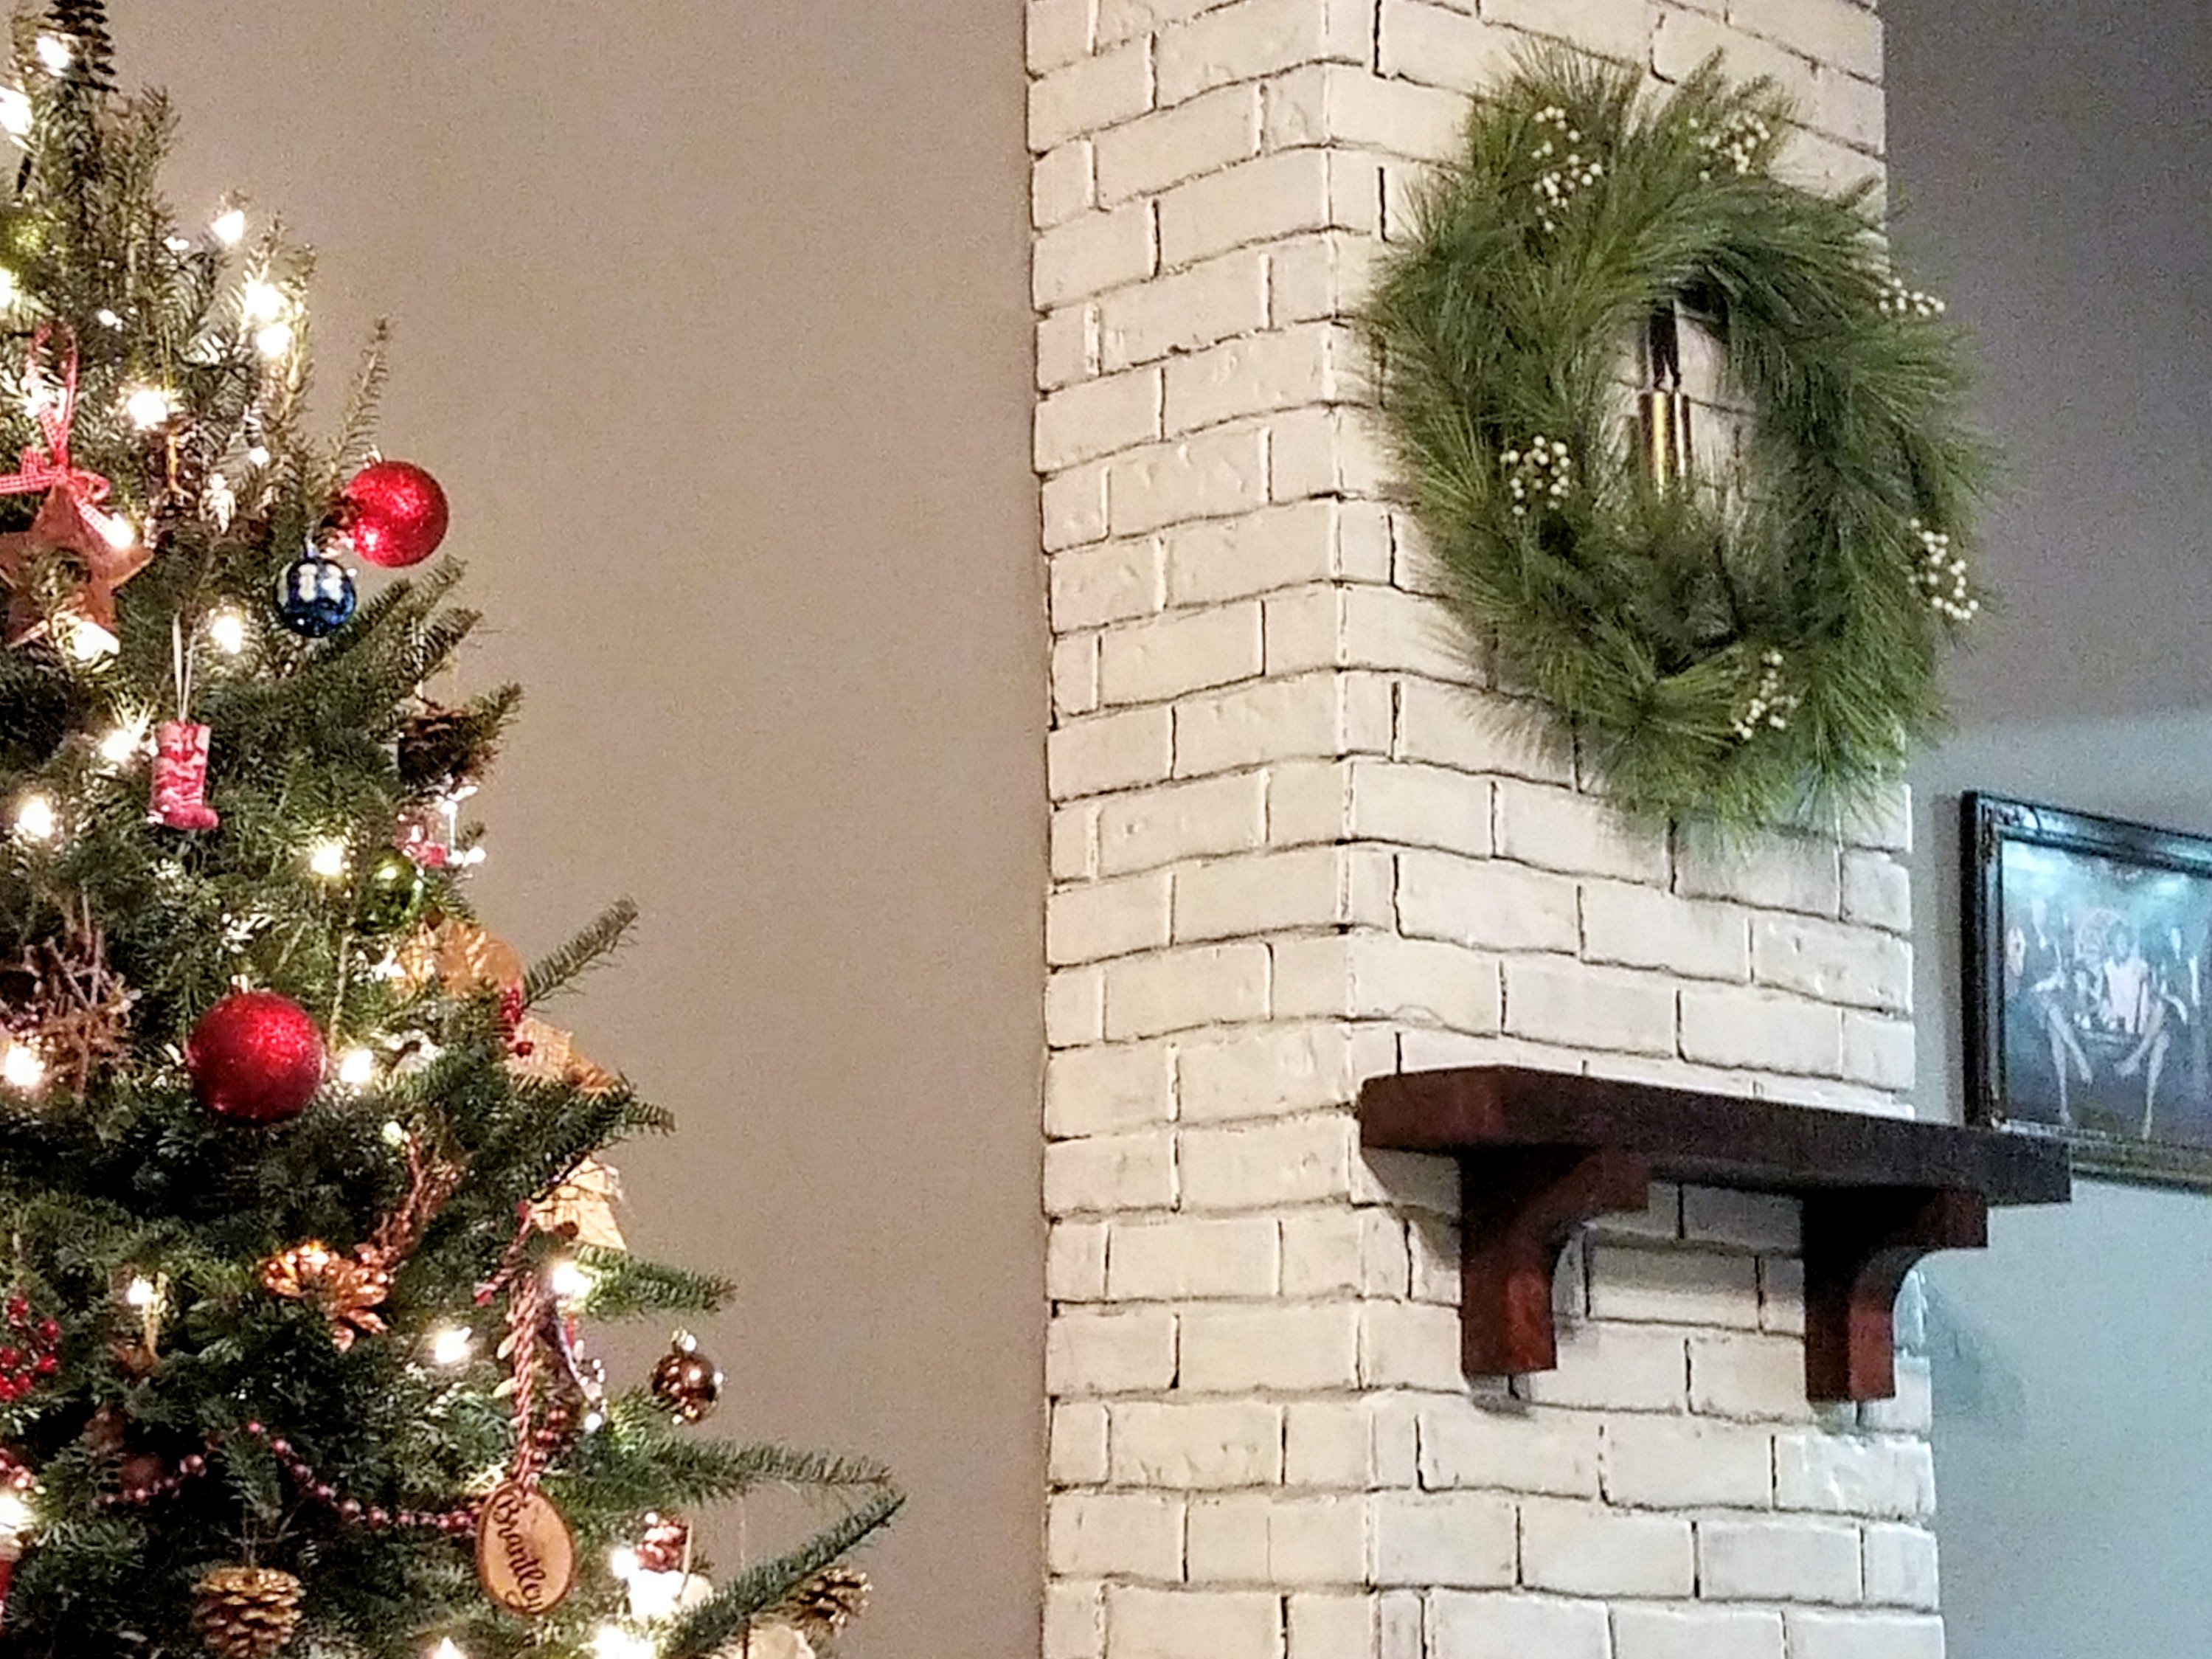
The Fake Chimney
This ancient house once had a chimney, two actually. In fact, one is still partially there. In the living room, you can see the shape of the old chimney up one wall. Usually I love character and uniqueness from times past. In this case, though, they covered this chimney up since there was no longer a fireplace. Then, since you could still see the shape of it, they added faux brick to it. Horrible, ugly, pinkish faux brick. It didn’t stand out nearly so bad when the little old lady who lived here previously had the room dark, dingy, and covered in nude paint and odd decor. But once we painted the walls grey, lightened the room, and completed changed the style, the chimney stood out like a sad, sore thumb.0ec56792a3b0f484bcf03c32a4763bf50bca28e68adedf8191

You get the picture here, but unfortunately this is even a mid-project shot. I really wish I had a picture of the drab room when the previous owner lived here to show!
We debated for a while. Do we tear it out? Do we paint it? Do we just take the faux brick off and embrace the odd shape in the room?
One day I said I was painting the bricks white and because we owned the paint and this was “free”, it would at the very least be a temporary solution and that we could always do something different down the road when we had more time. (Ha!)
No one stopped me, so I went forward with a brush and some paint. My plan was to add a couple of coats and make them completely white. One coat in I found that it was actually a bit difficult to get the paint down in all the crevices. We left the one, imperfect coat to dry for a night. The next day we realized the this “whitewashed” look was it. I didn’t need a second coat at all.

Then I wanted a faux mantel to finish it off. Several weeks of debating with each other ensued. I had a very specific picture in my mind of color, shape and size.
We finally have that little mantel, made of 100-some year old barnwood, added to our chimney. And I LOVE it.


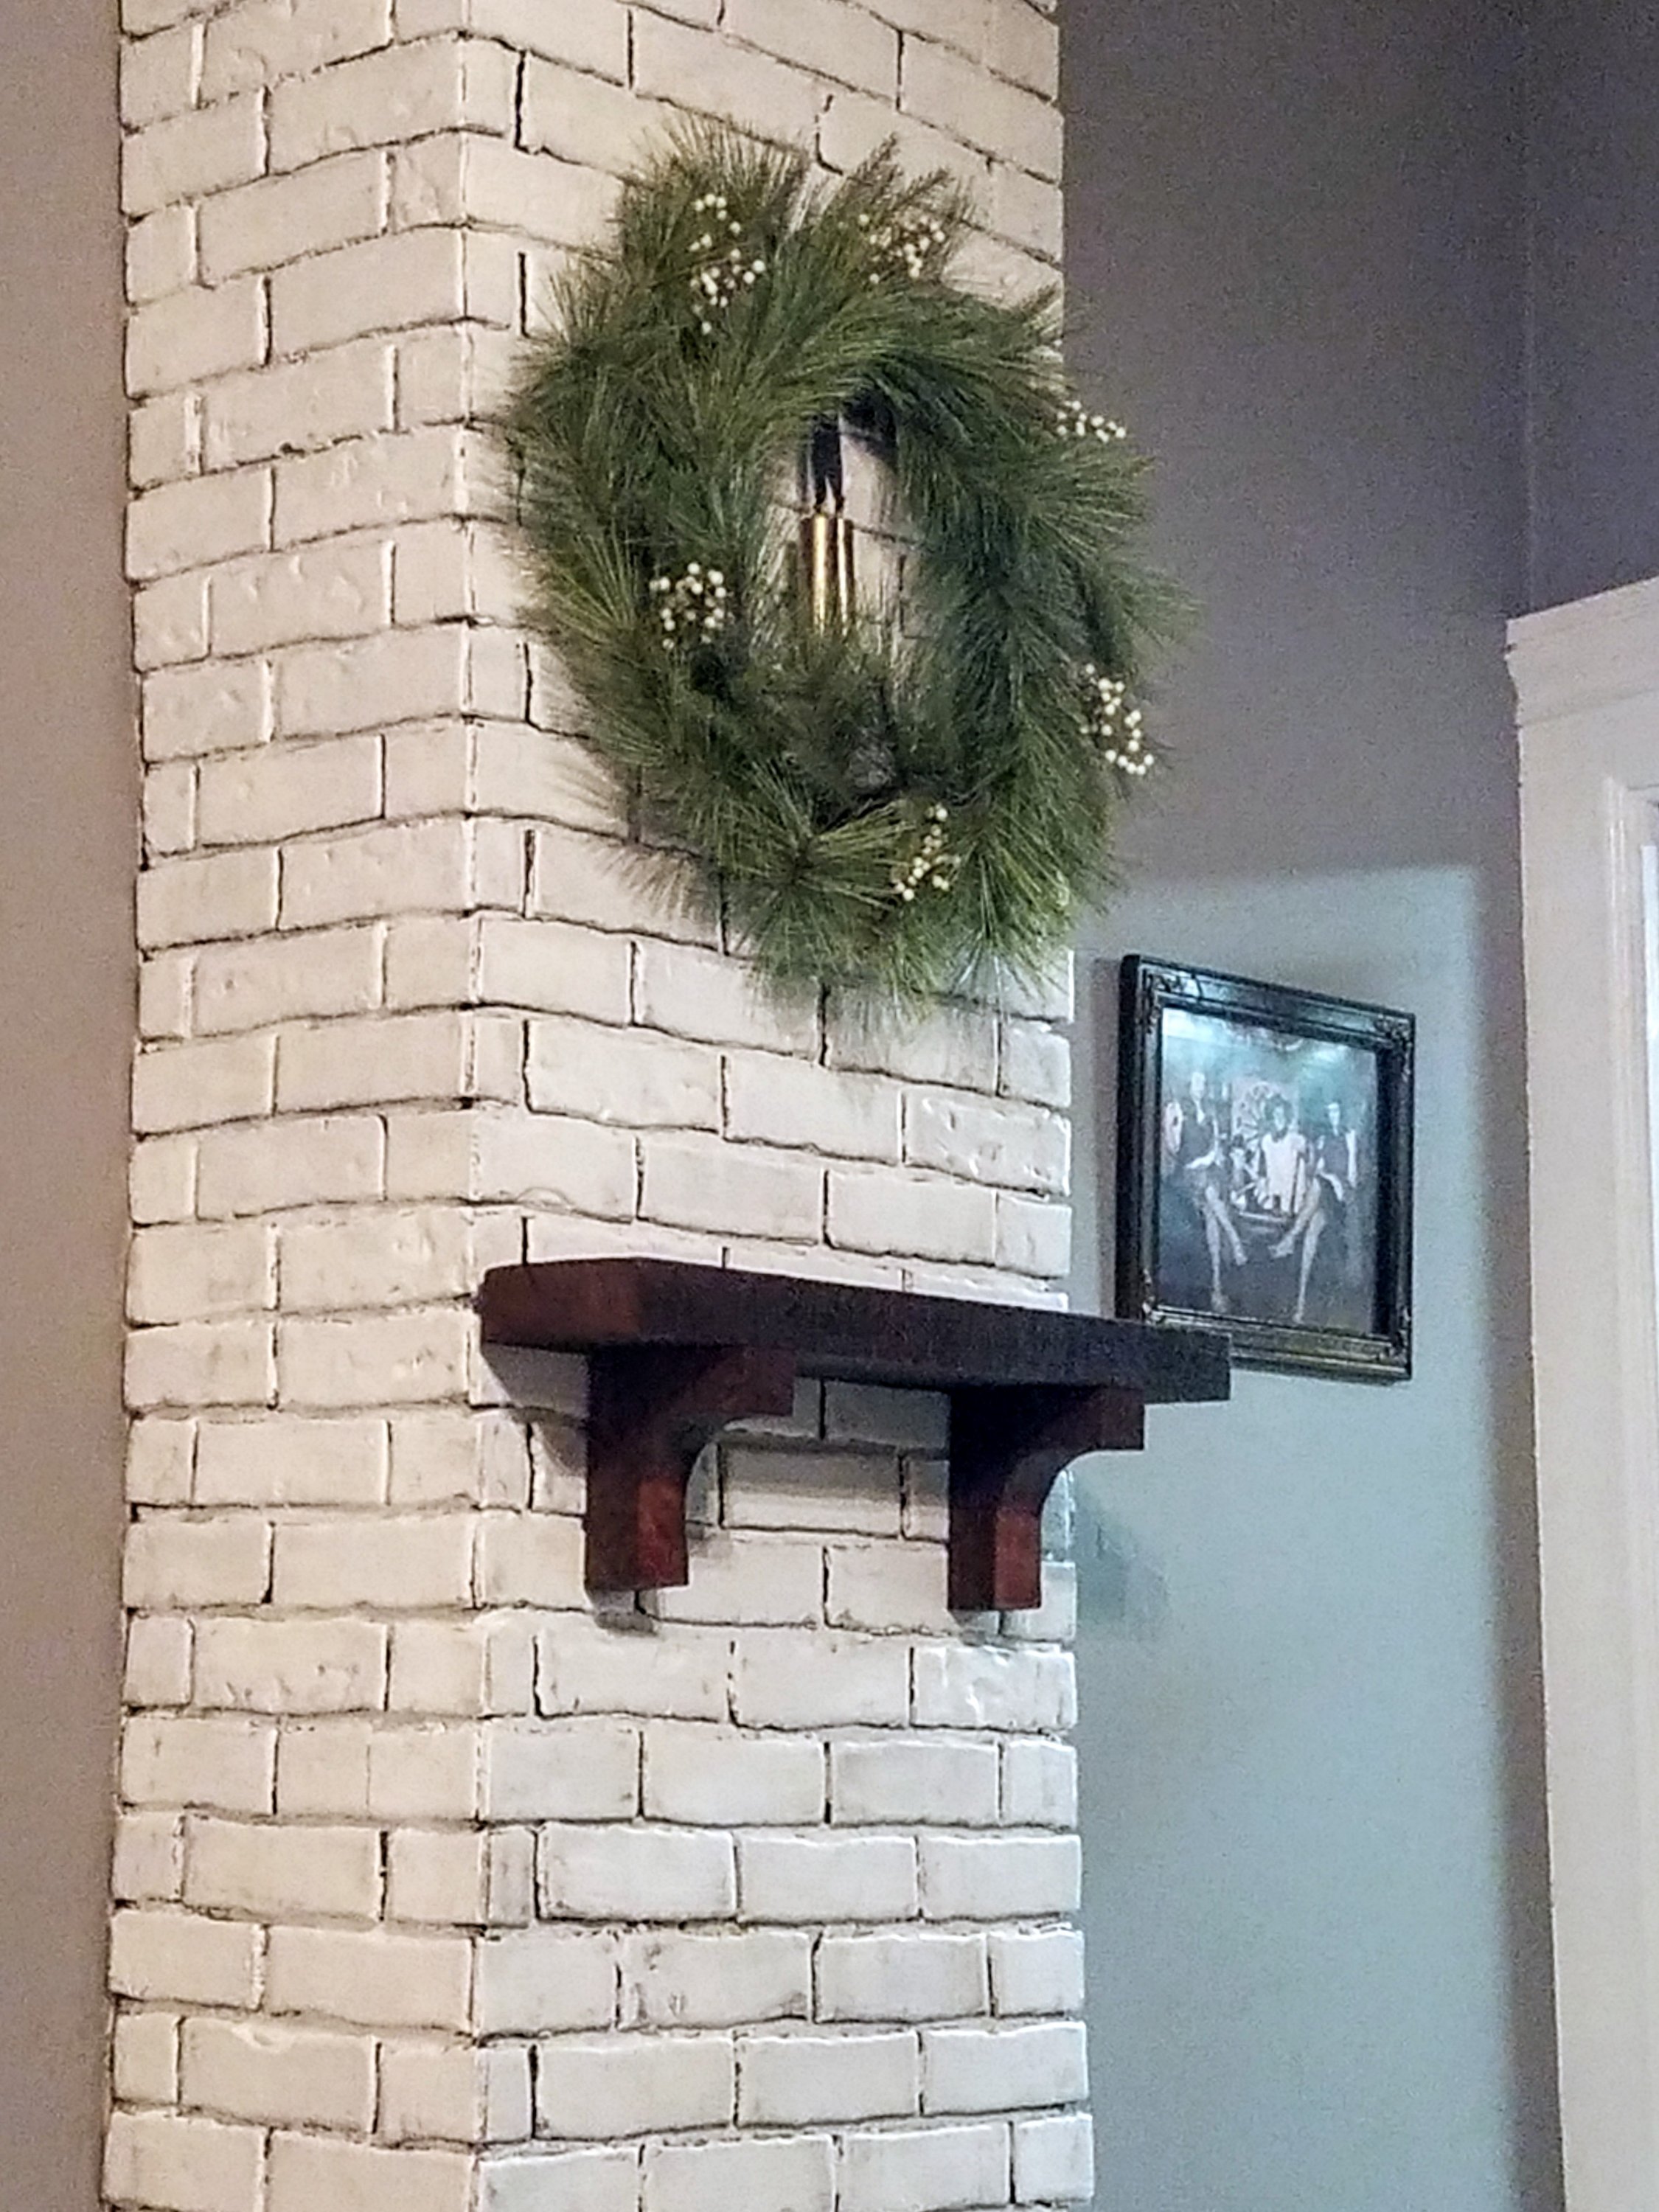
Sometimes tiny, simple, easy projects turn into more lengthy and complex ones. Ok, usually. But, when you are done and sit back and look at your work, that makes it all worth it
Don’t mind the empty wall next to it, at least the Christmas tree fills the space for now. I have plans for huge floating shelves all up and down there as “built-ins” for the room. Any guess how long that will take us? 😂
Teen Bedroom Redo
So, I’ve mentioned that this new-to-us old house is in pretty ugly shape and that we have been redoing all the rooms bit by bit. One of the rooms that hadn’t gotten any love since we moved in was Jordin’s room. Check out these dingy, bland, old lady looking photos:
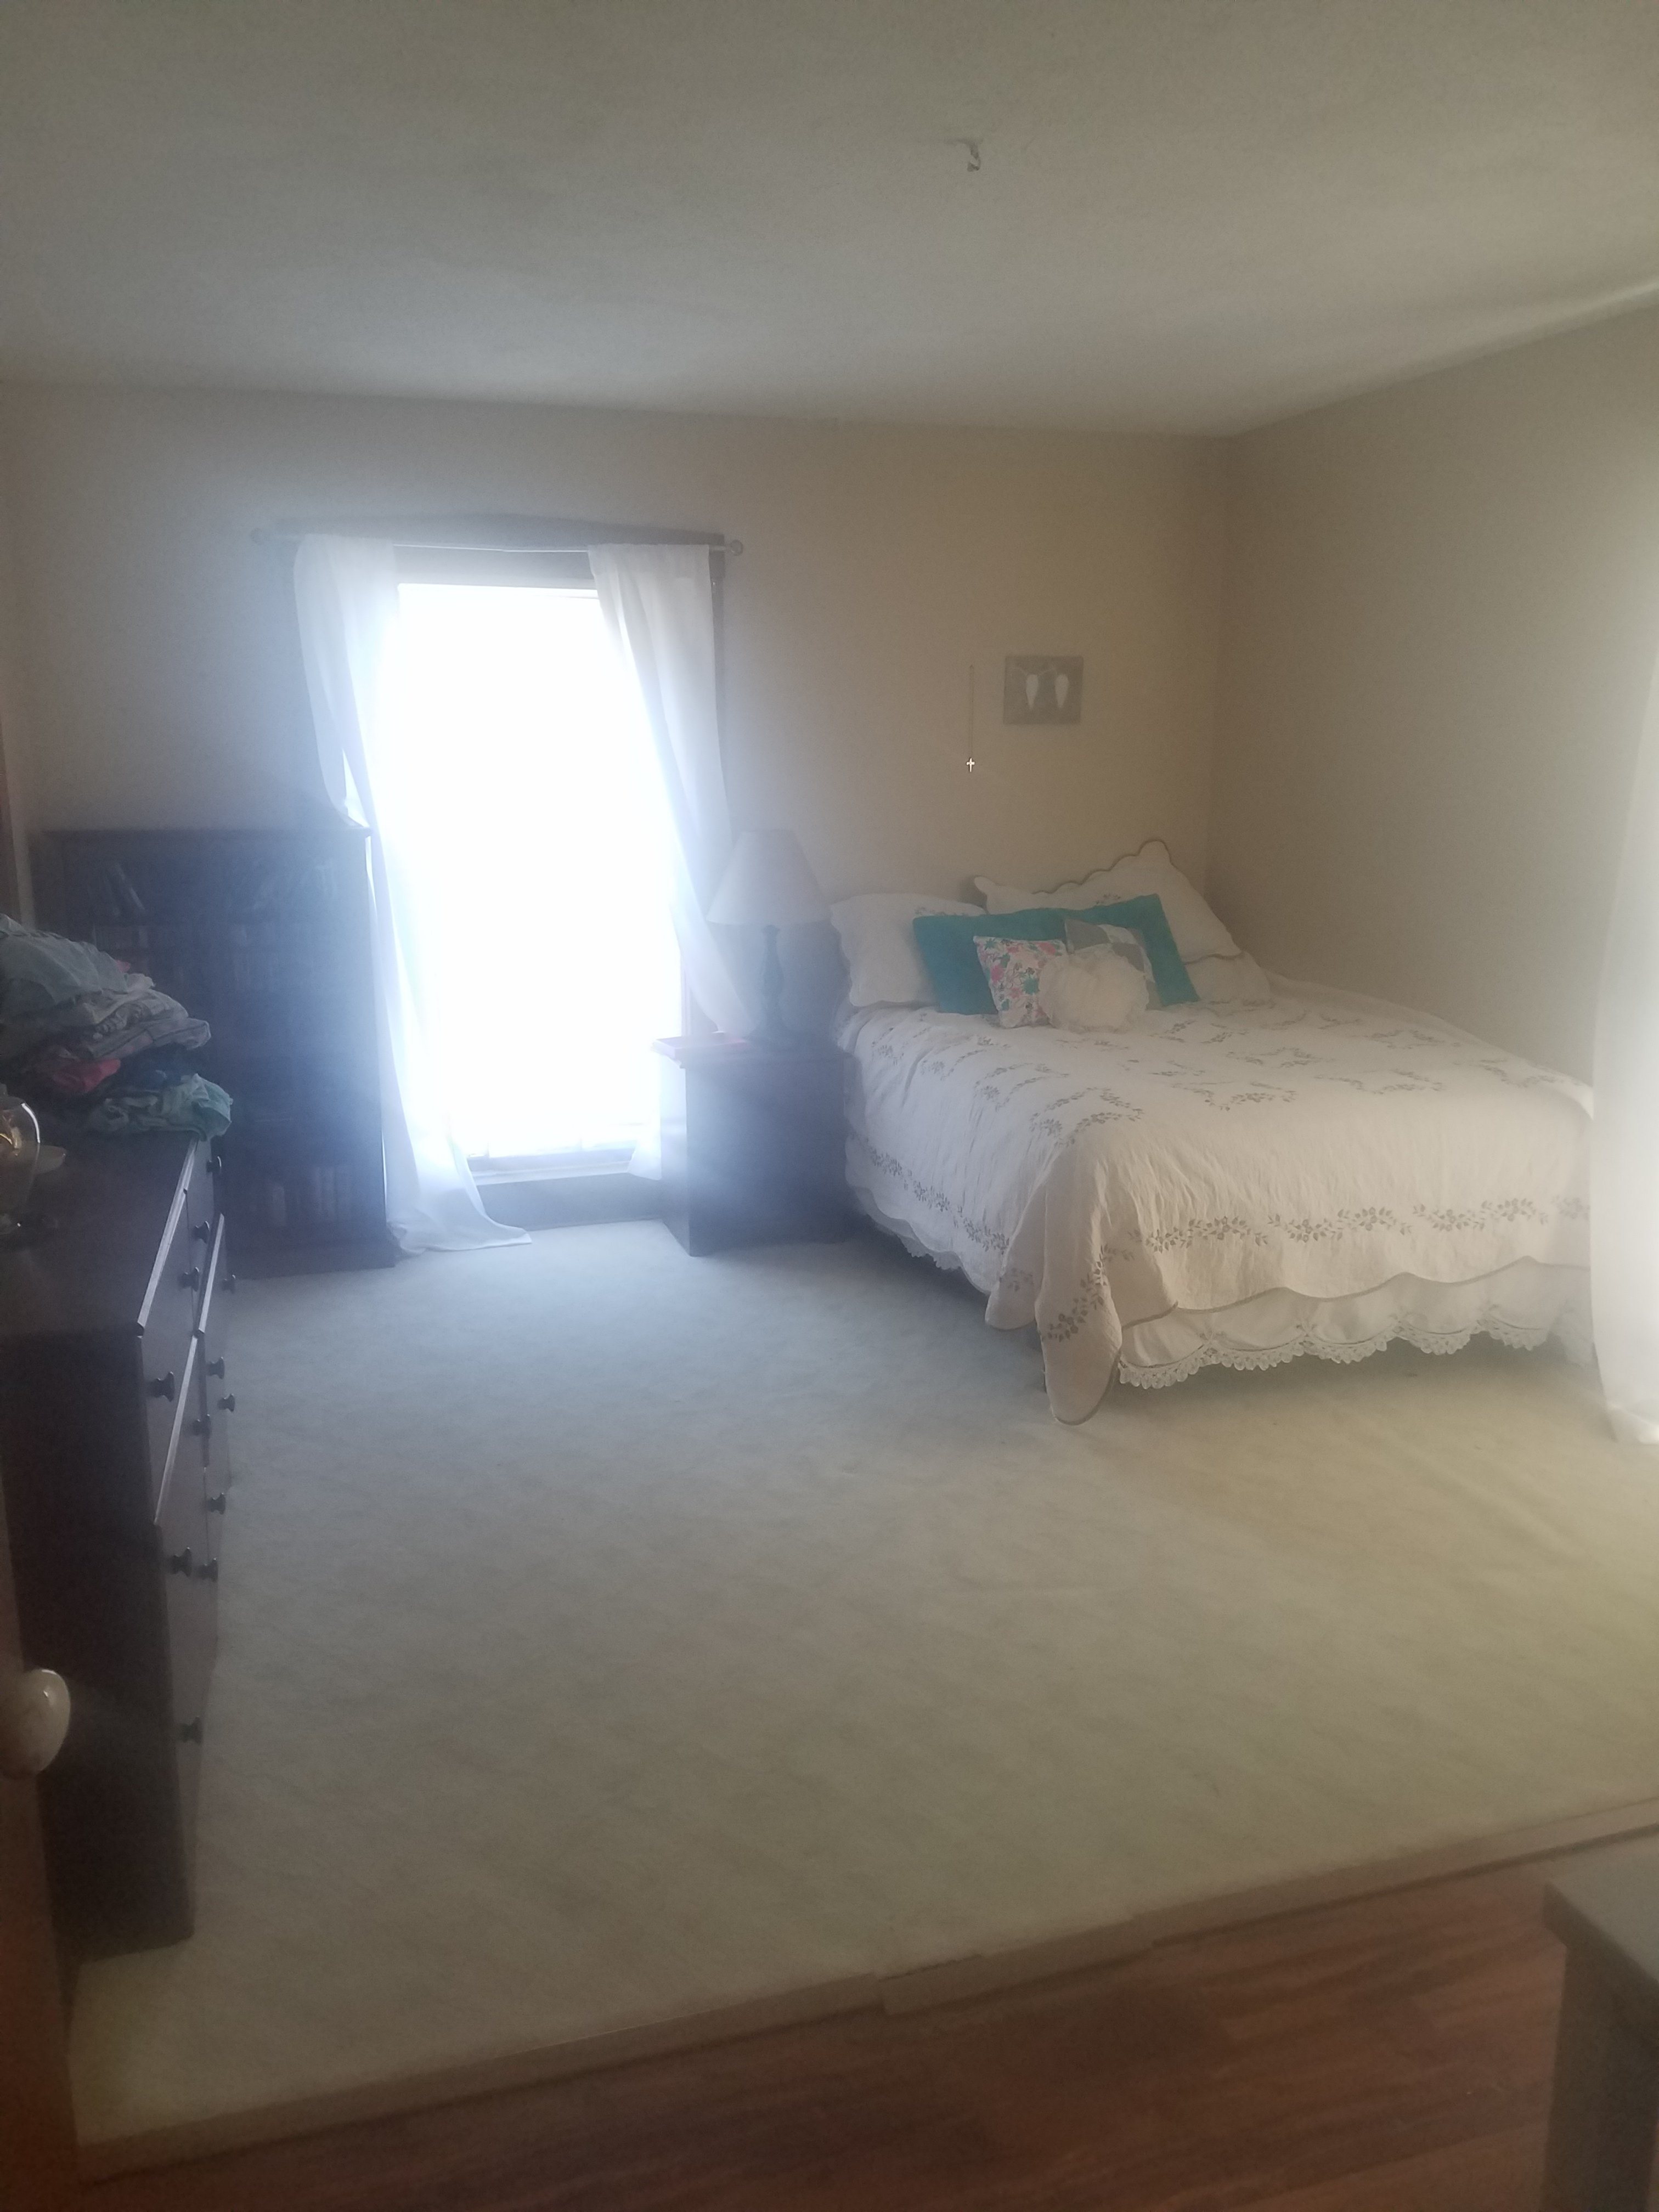
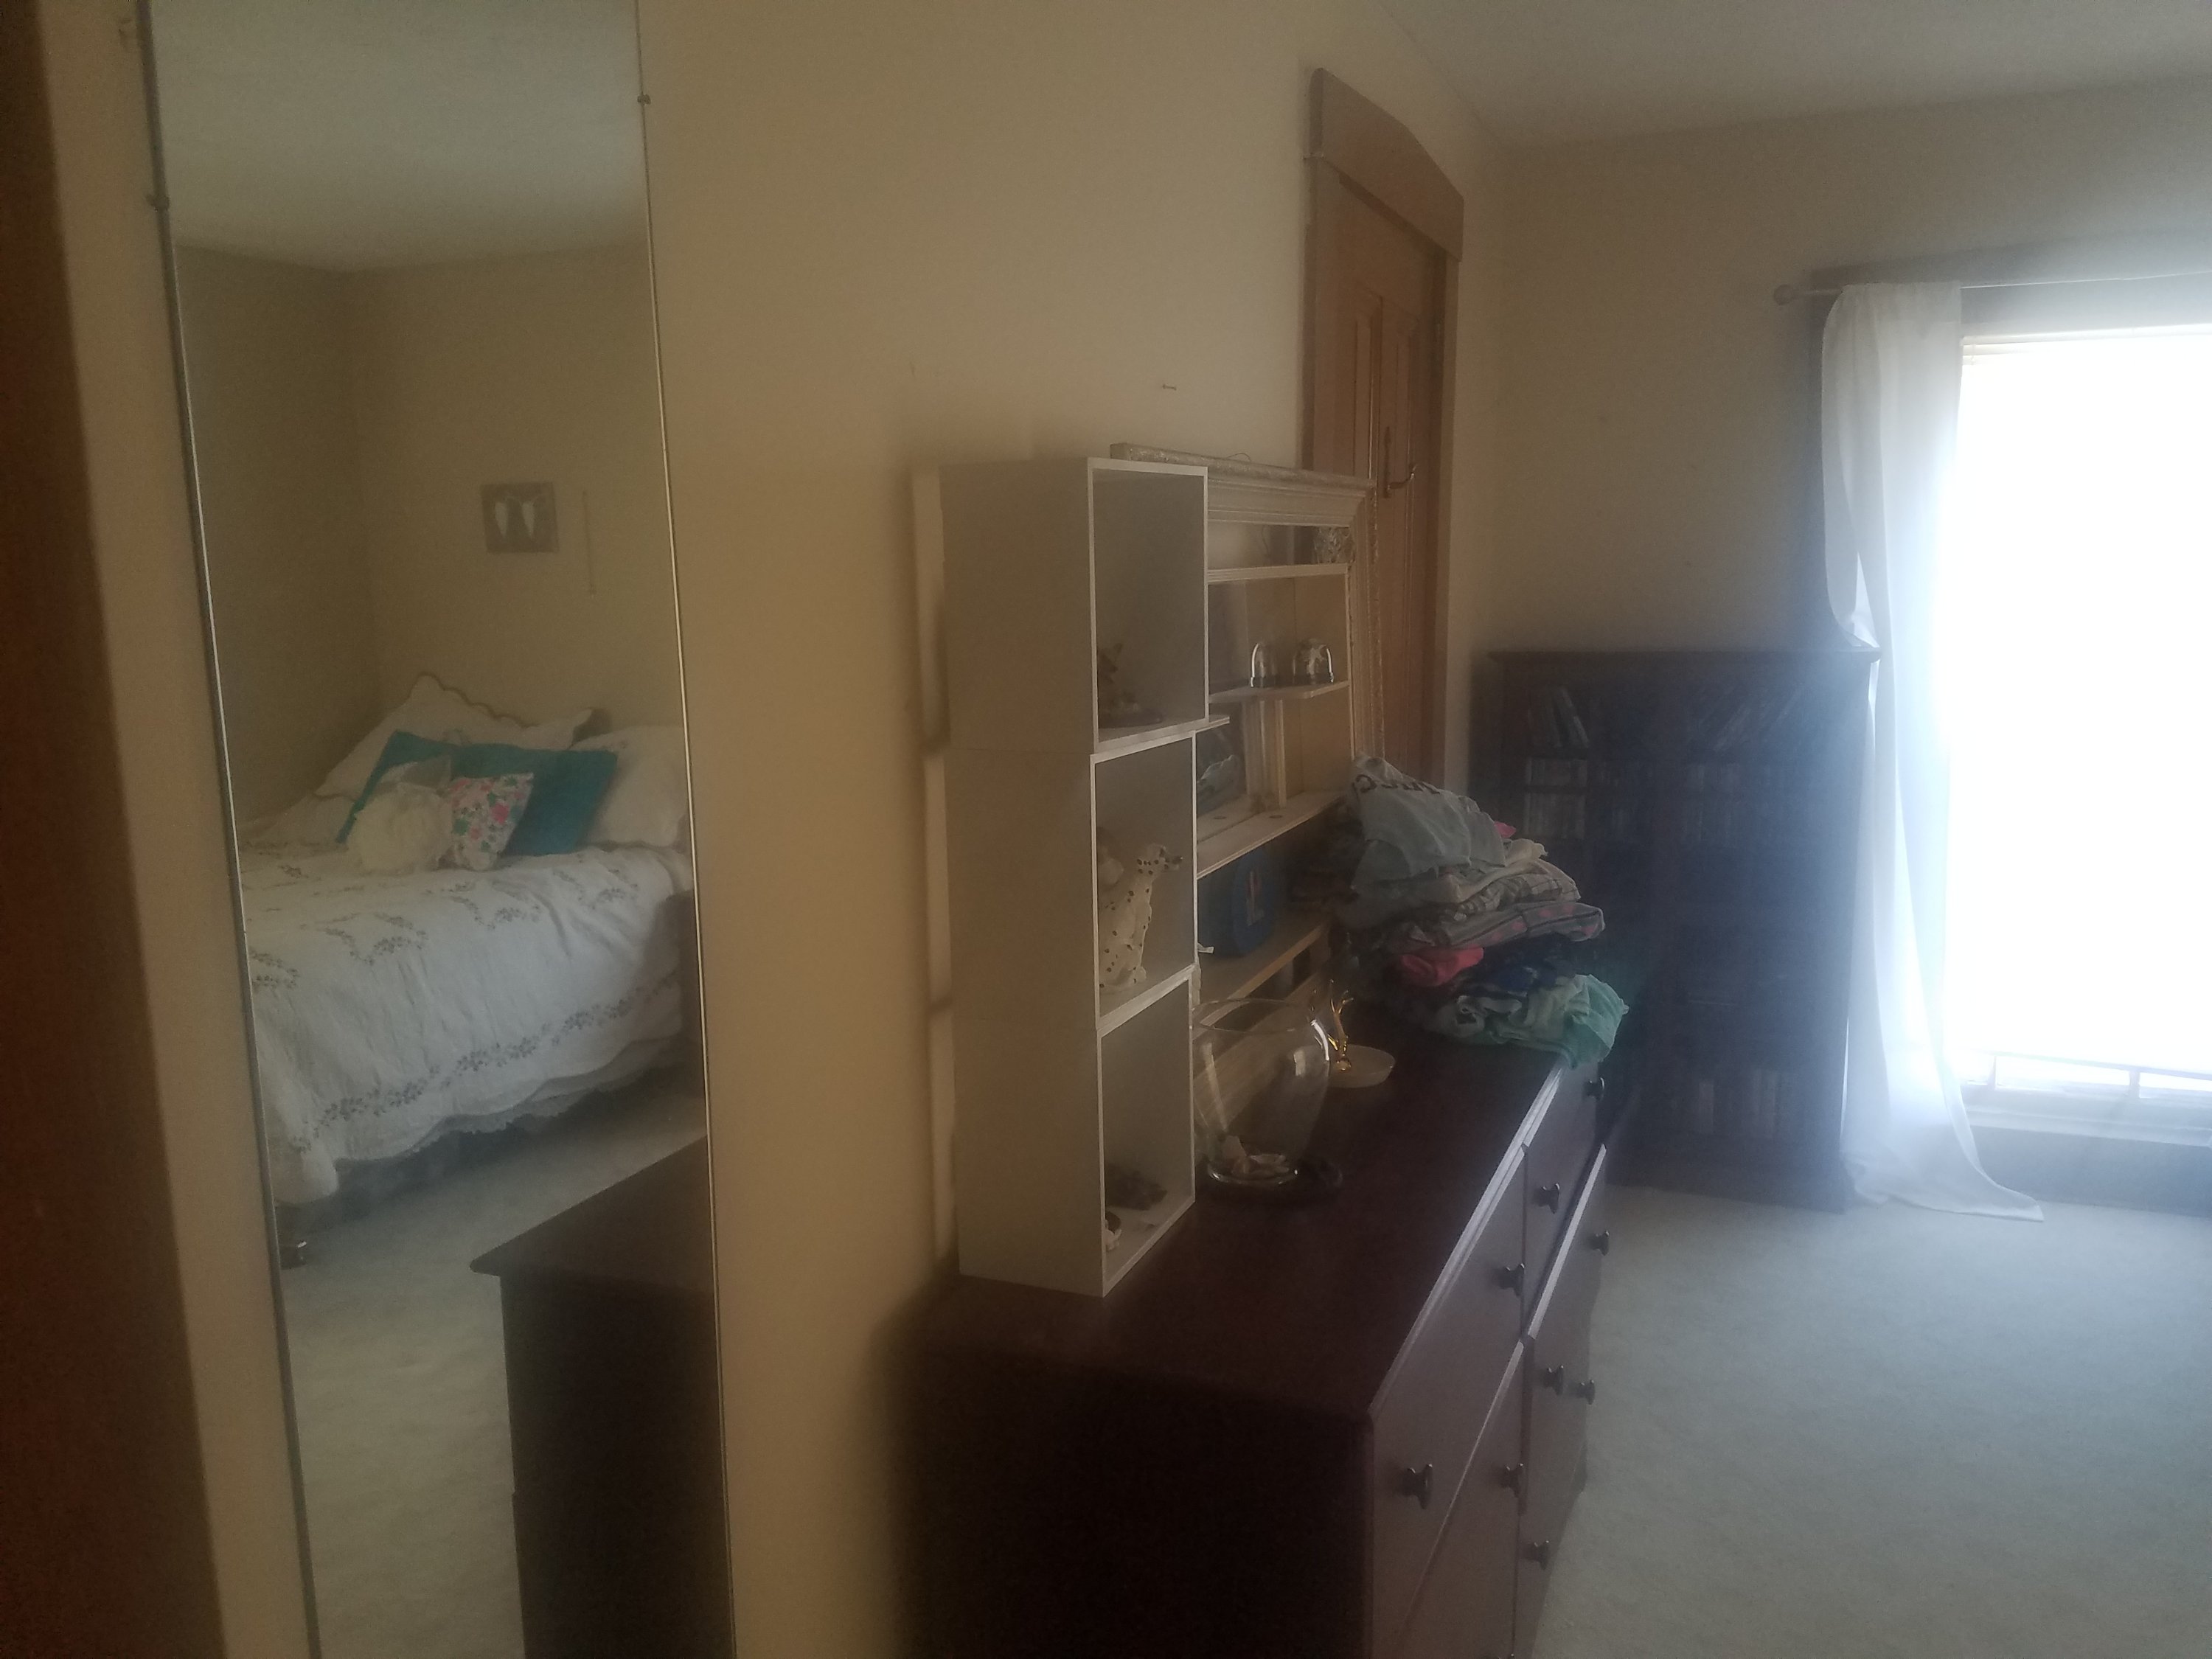
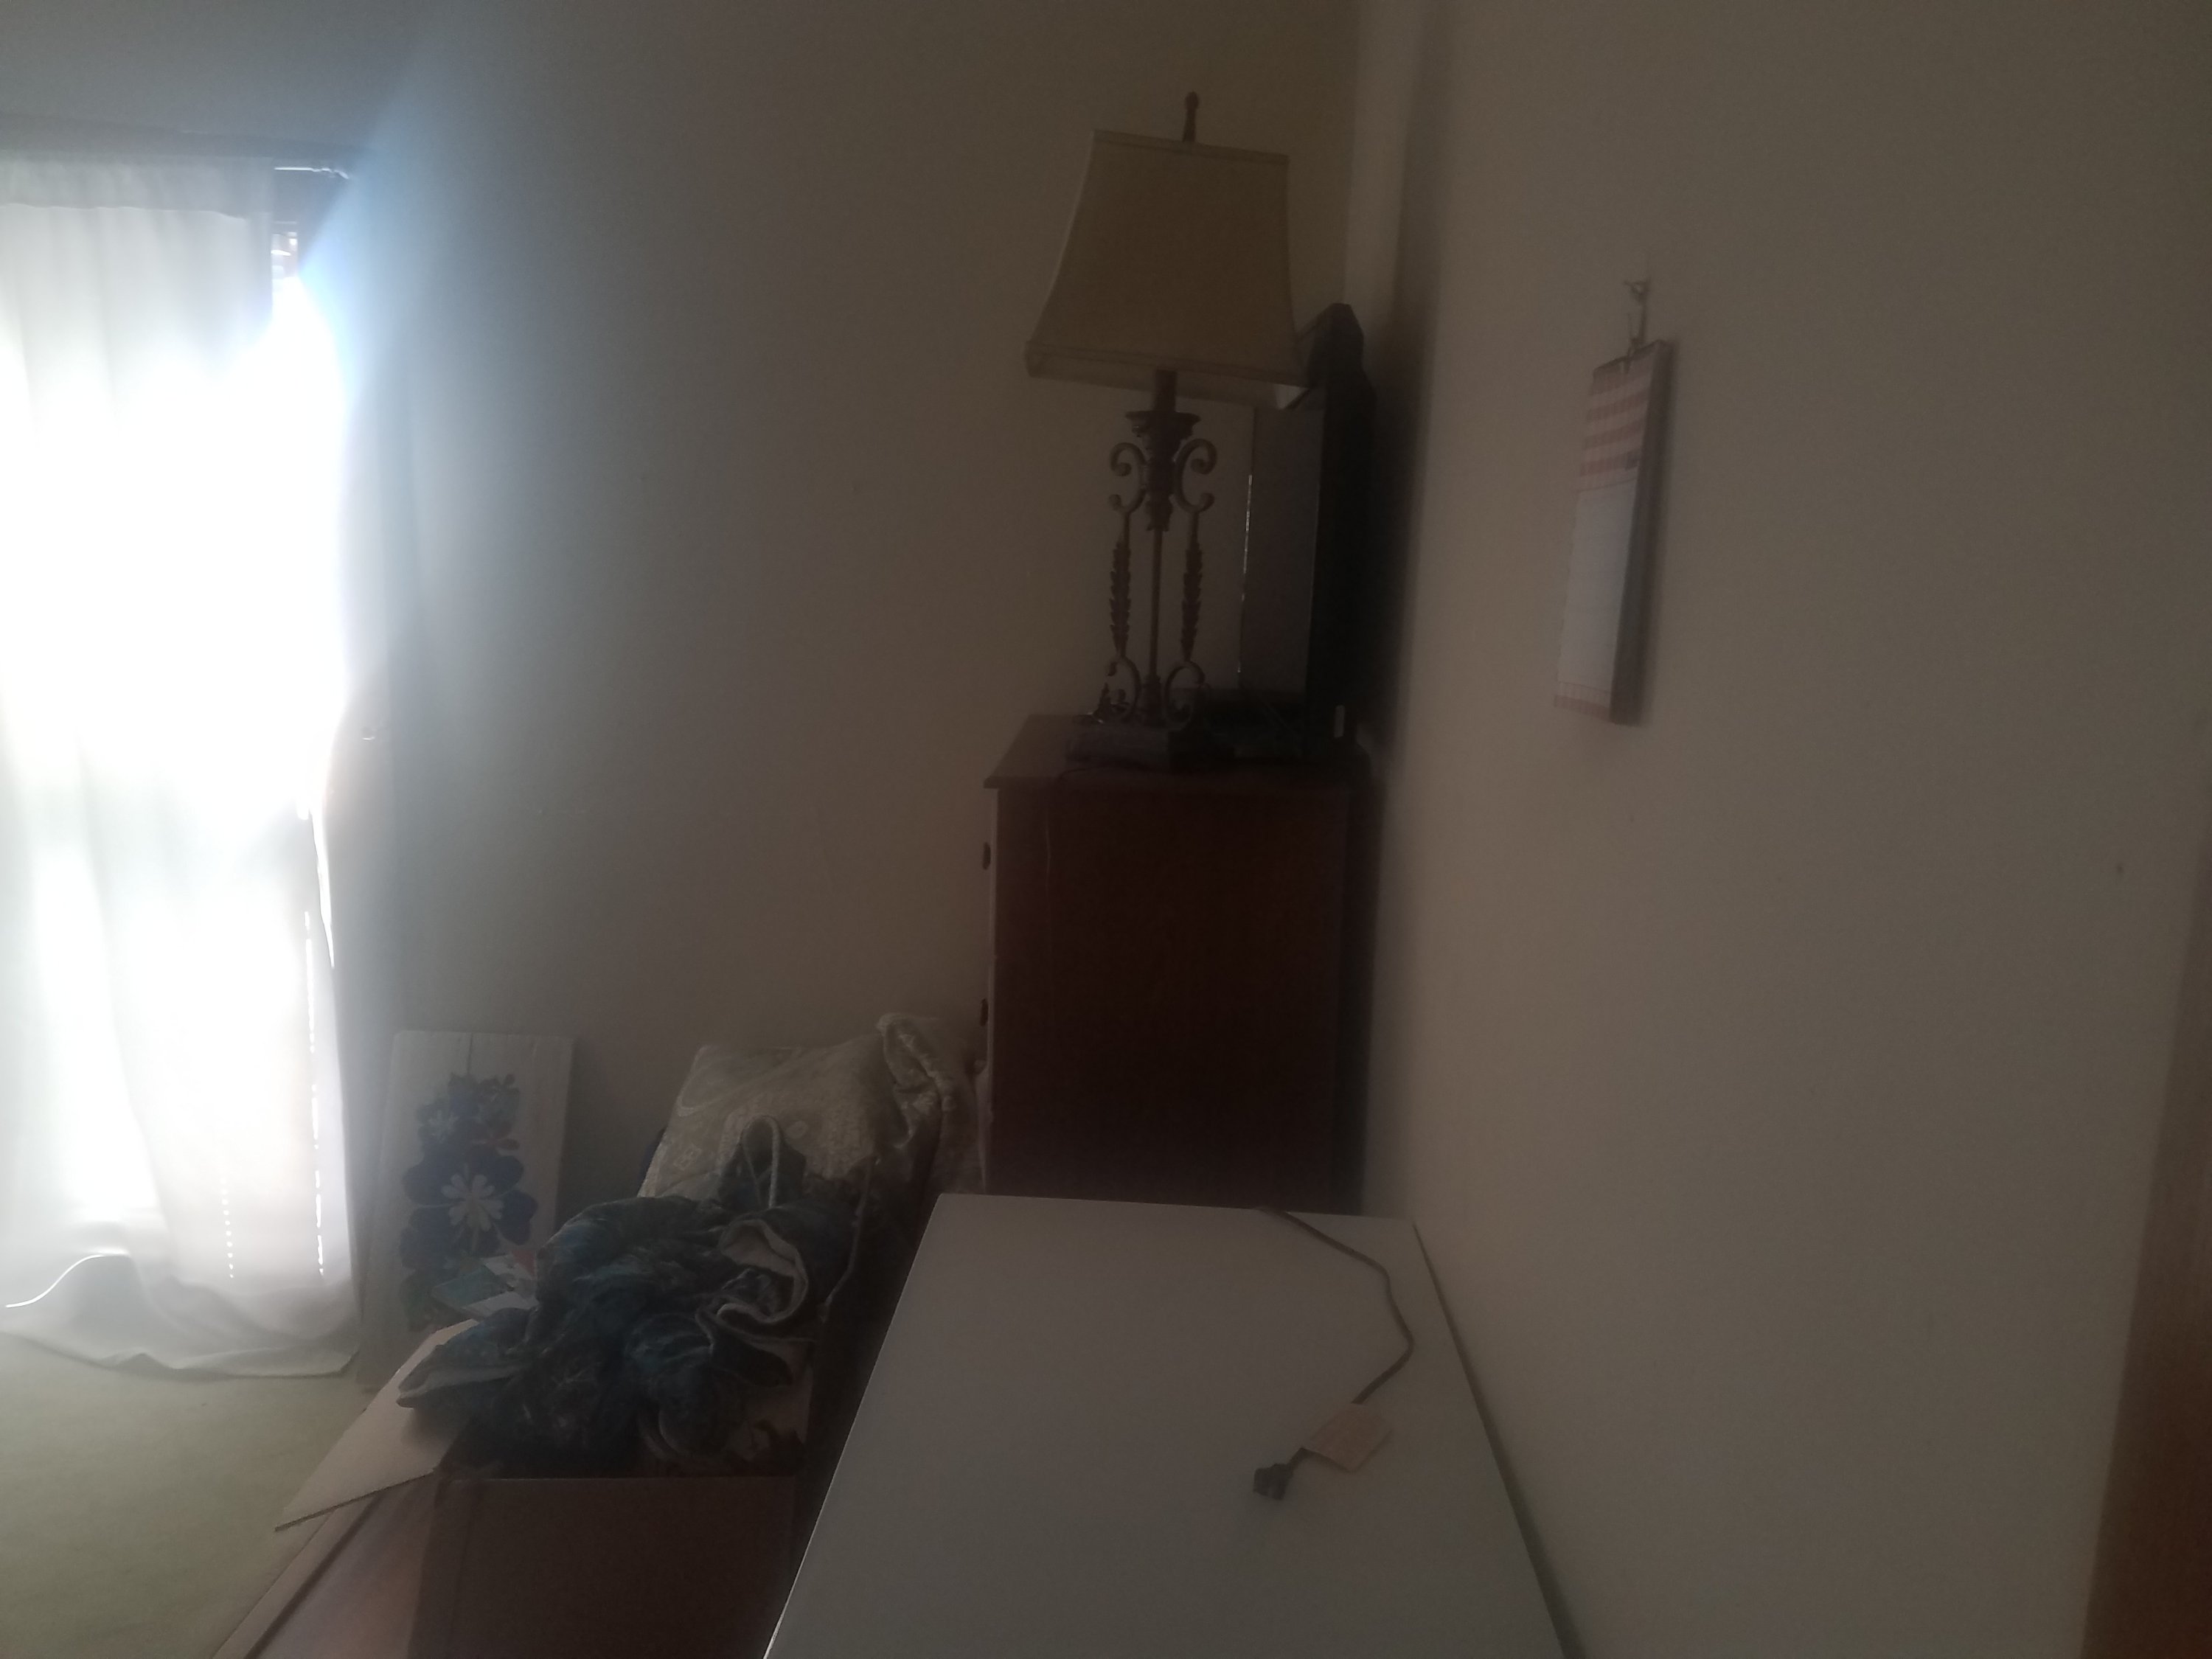
We hadn’t even hung anything on the walls because we knew we wanted to paint. Poor girl! Plus, the rooms all need to have more outlets put in (how is one outlet nearly enough?!) and overhead lights with switches added (hello?!). Needless to say, she was not thrilled in her set up. But, enter her 16th birthday, and we had the perfect excuse to make ourselves get the room beautified and surprise her with completely glammed out digs. Annnd… after:
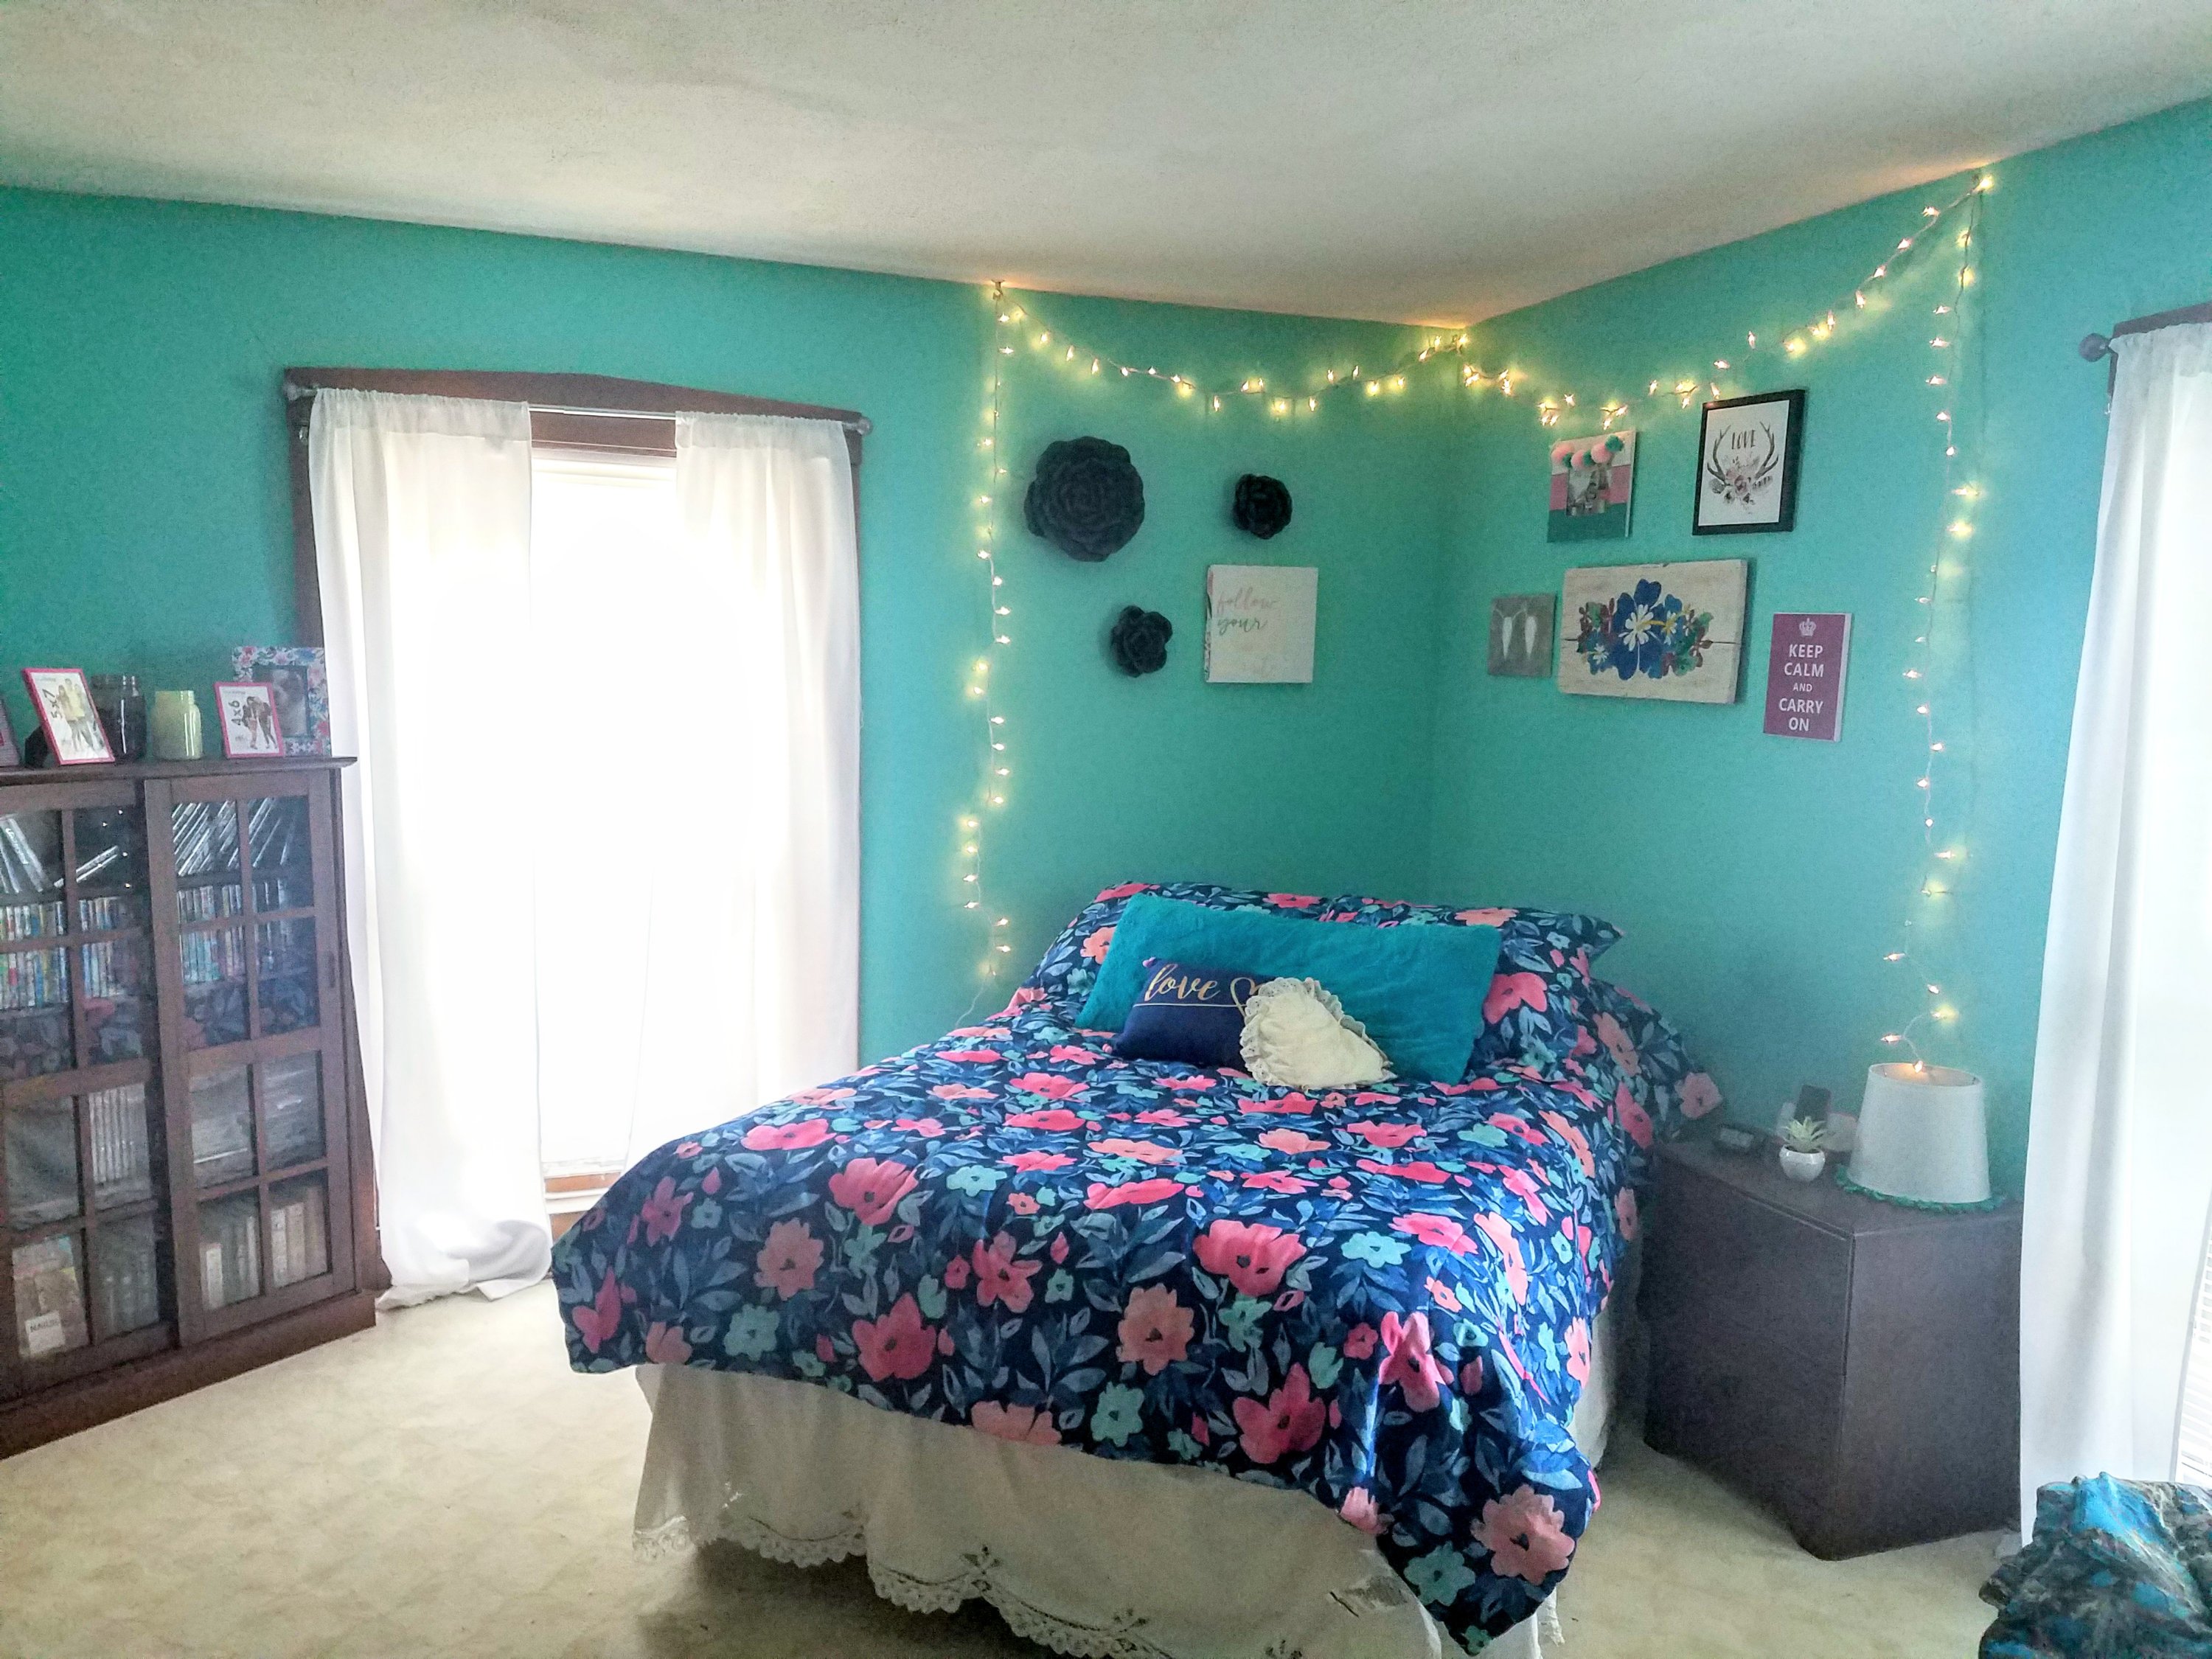
Ta da! Total teen girl. Her jaw dropped. Win!
This was the mint turquoise color she had picked for her bedroom at our previous house and she was really wanting it again. It is super pretty, and not quite as bright in person. She also loves pink and peach. I added some navy to calm and tie the colors in and some gold hints for glam factor. Sounds busy. Totally goes.
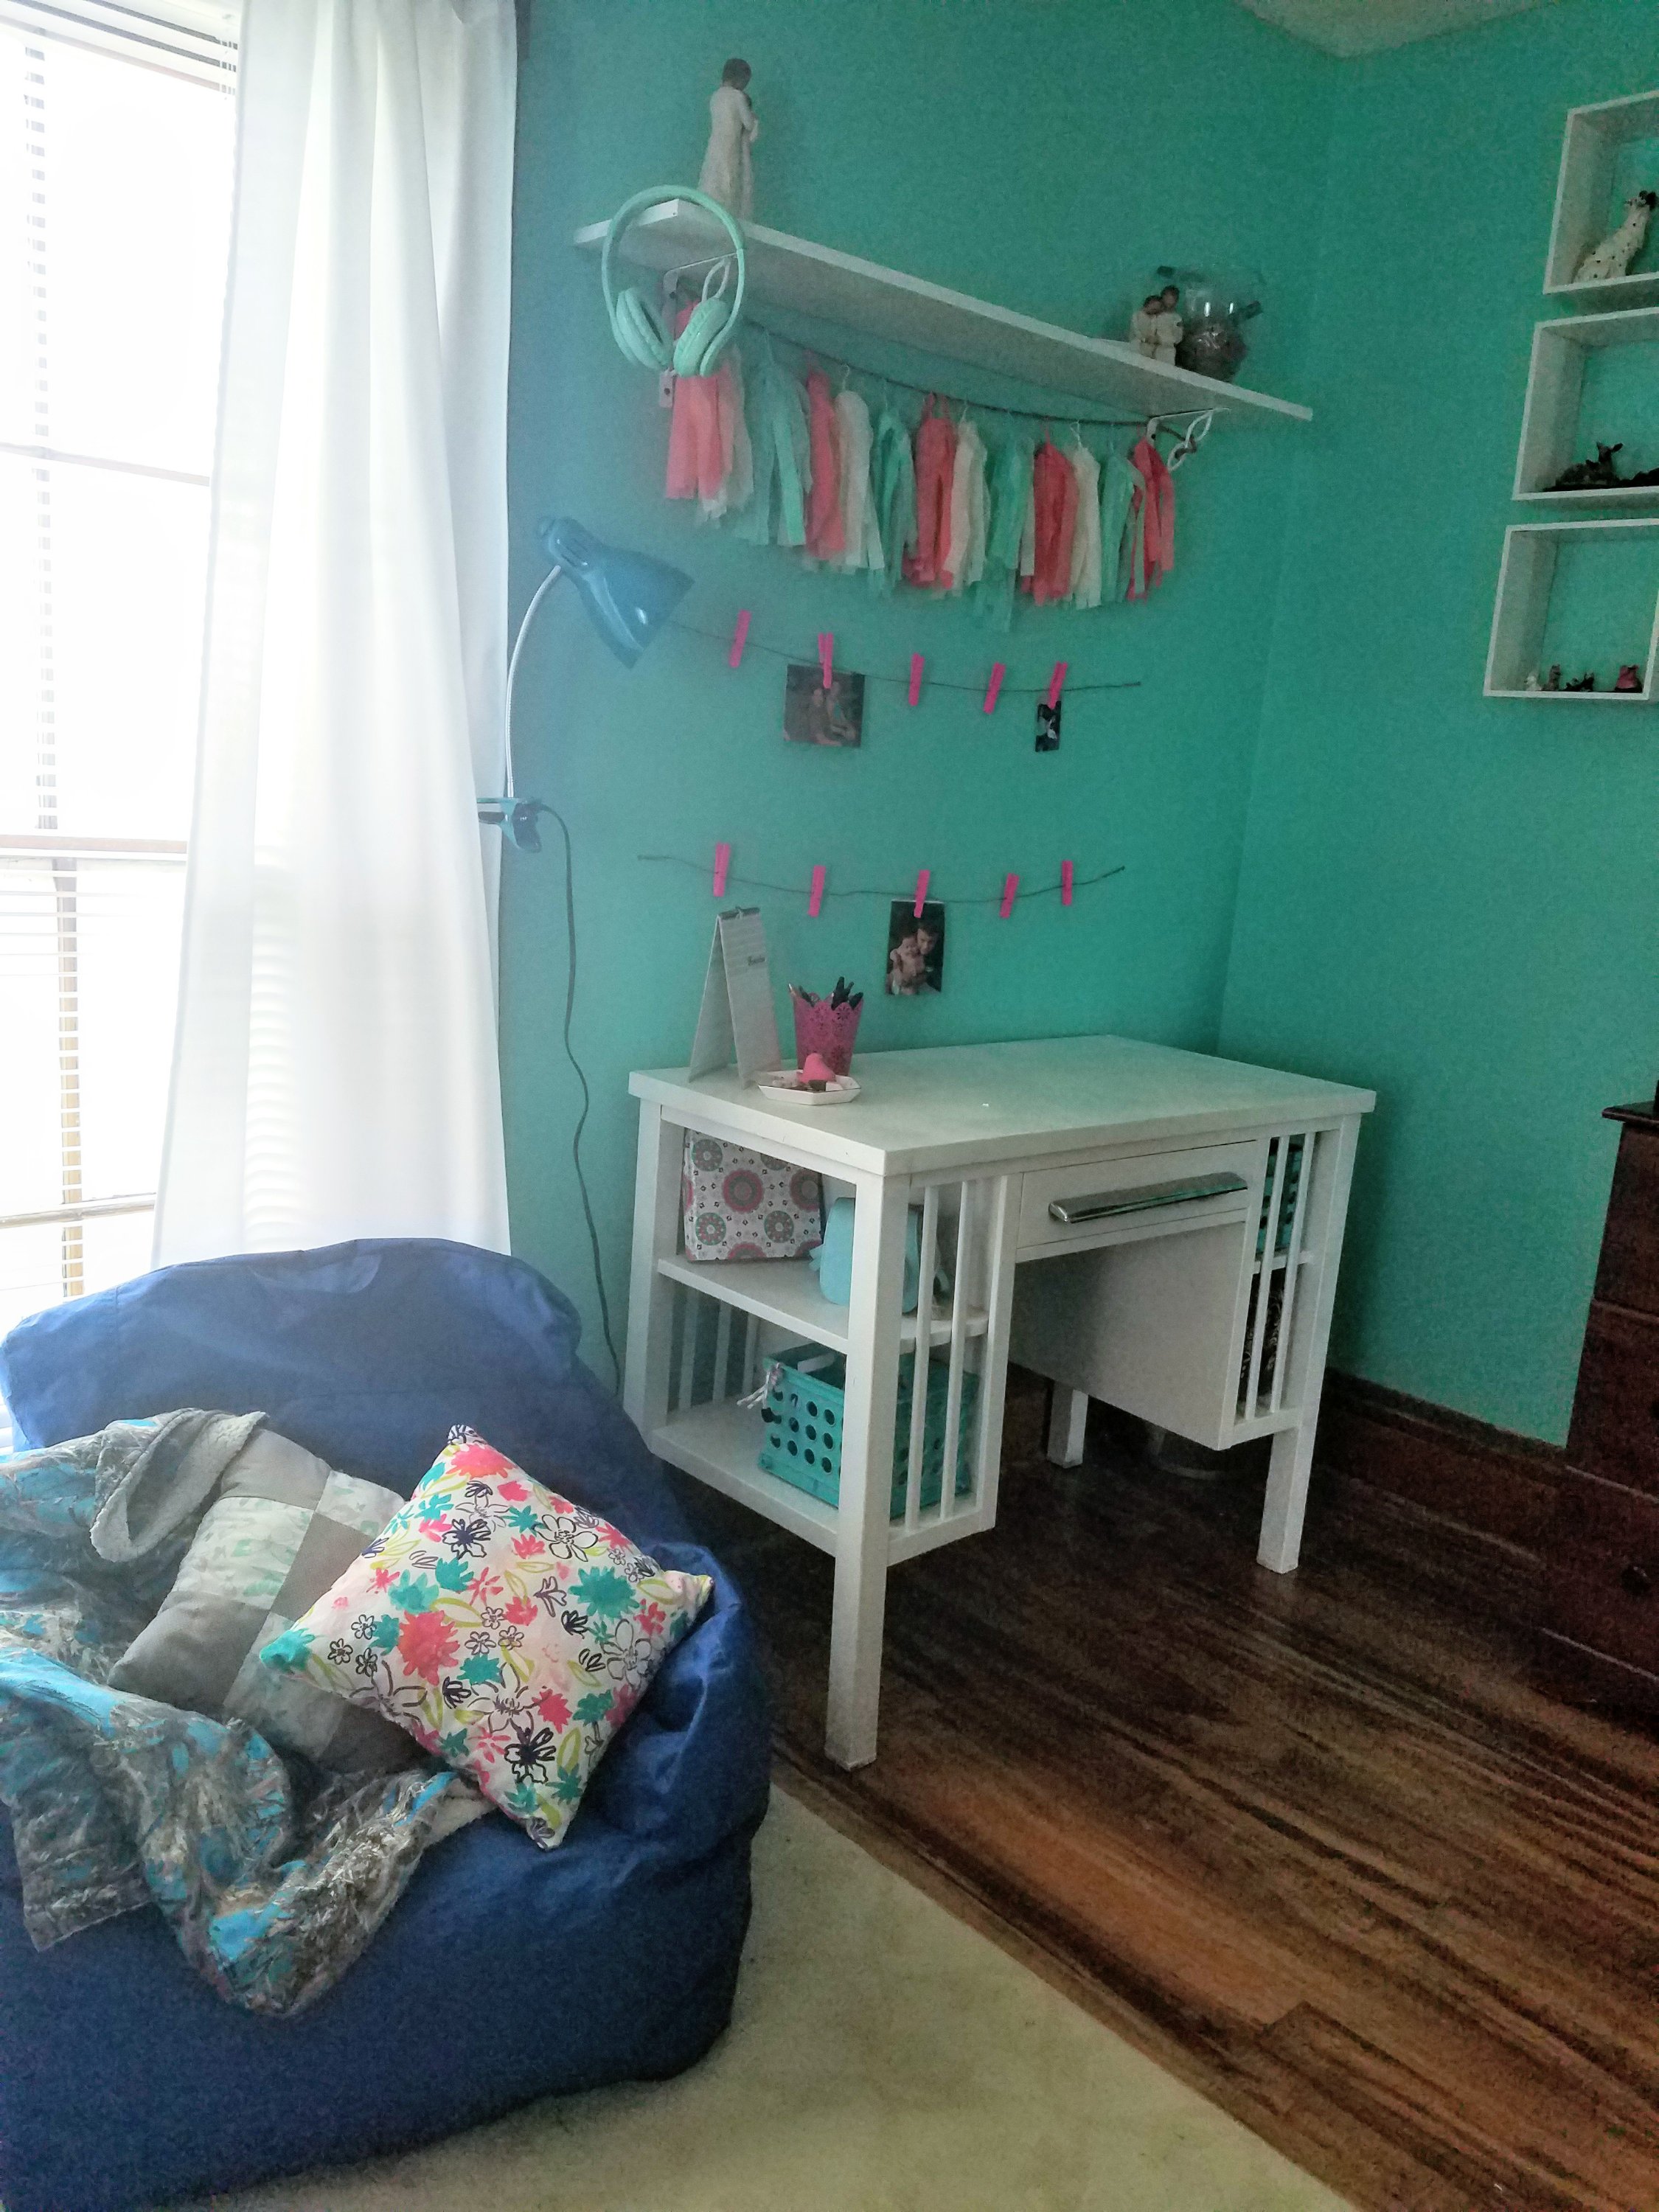

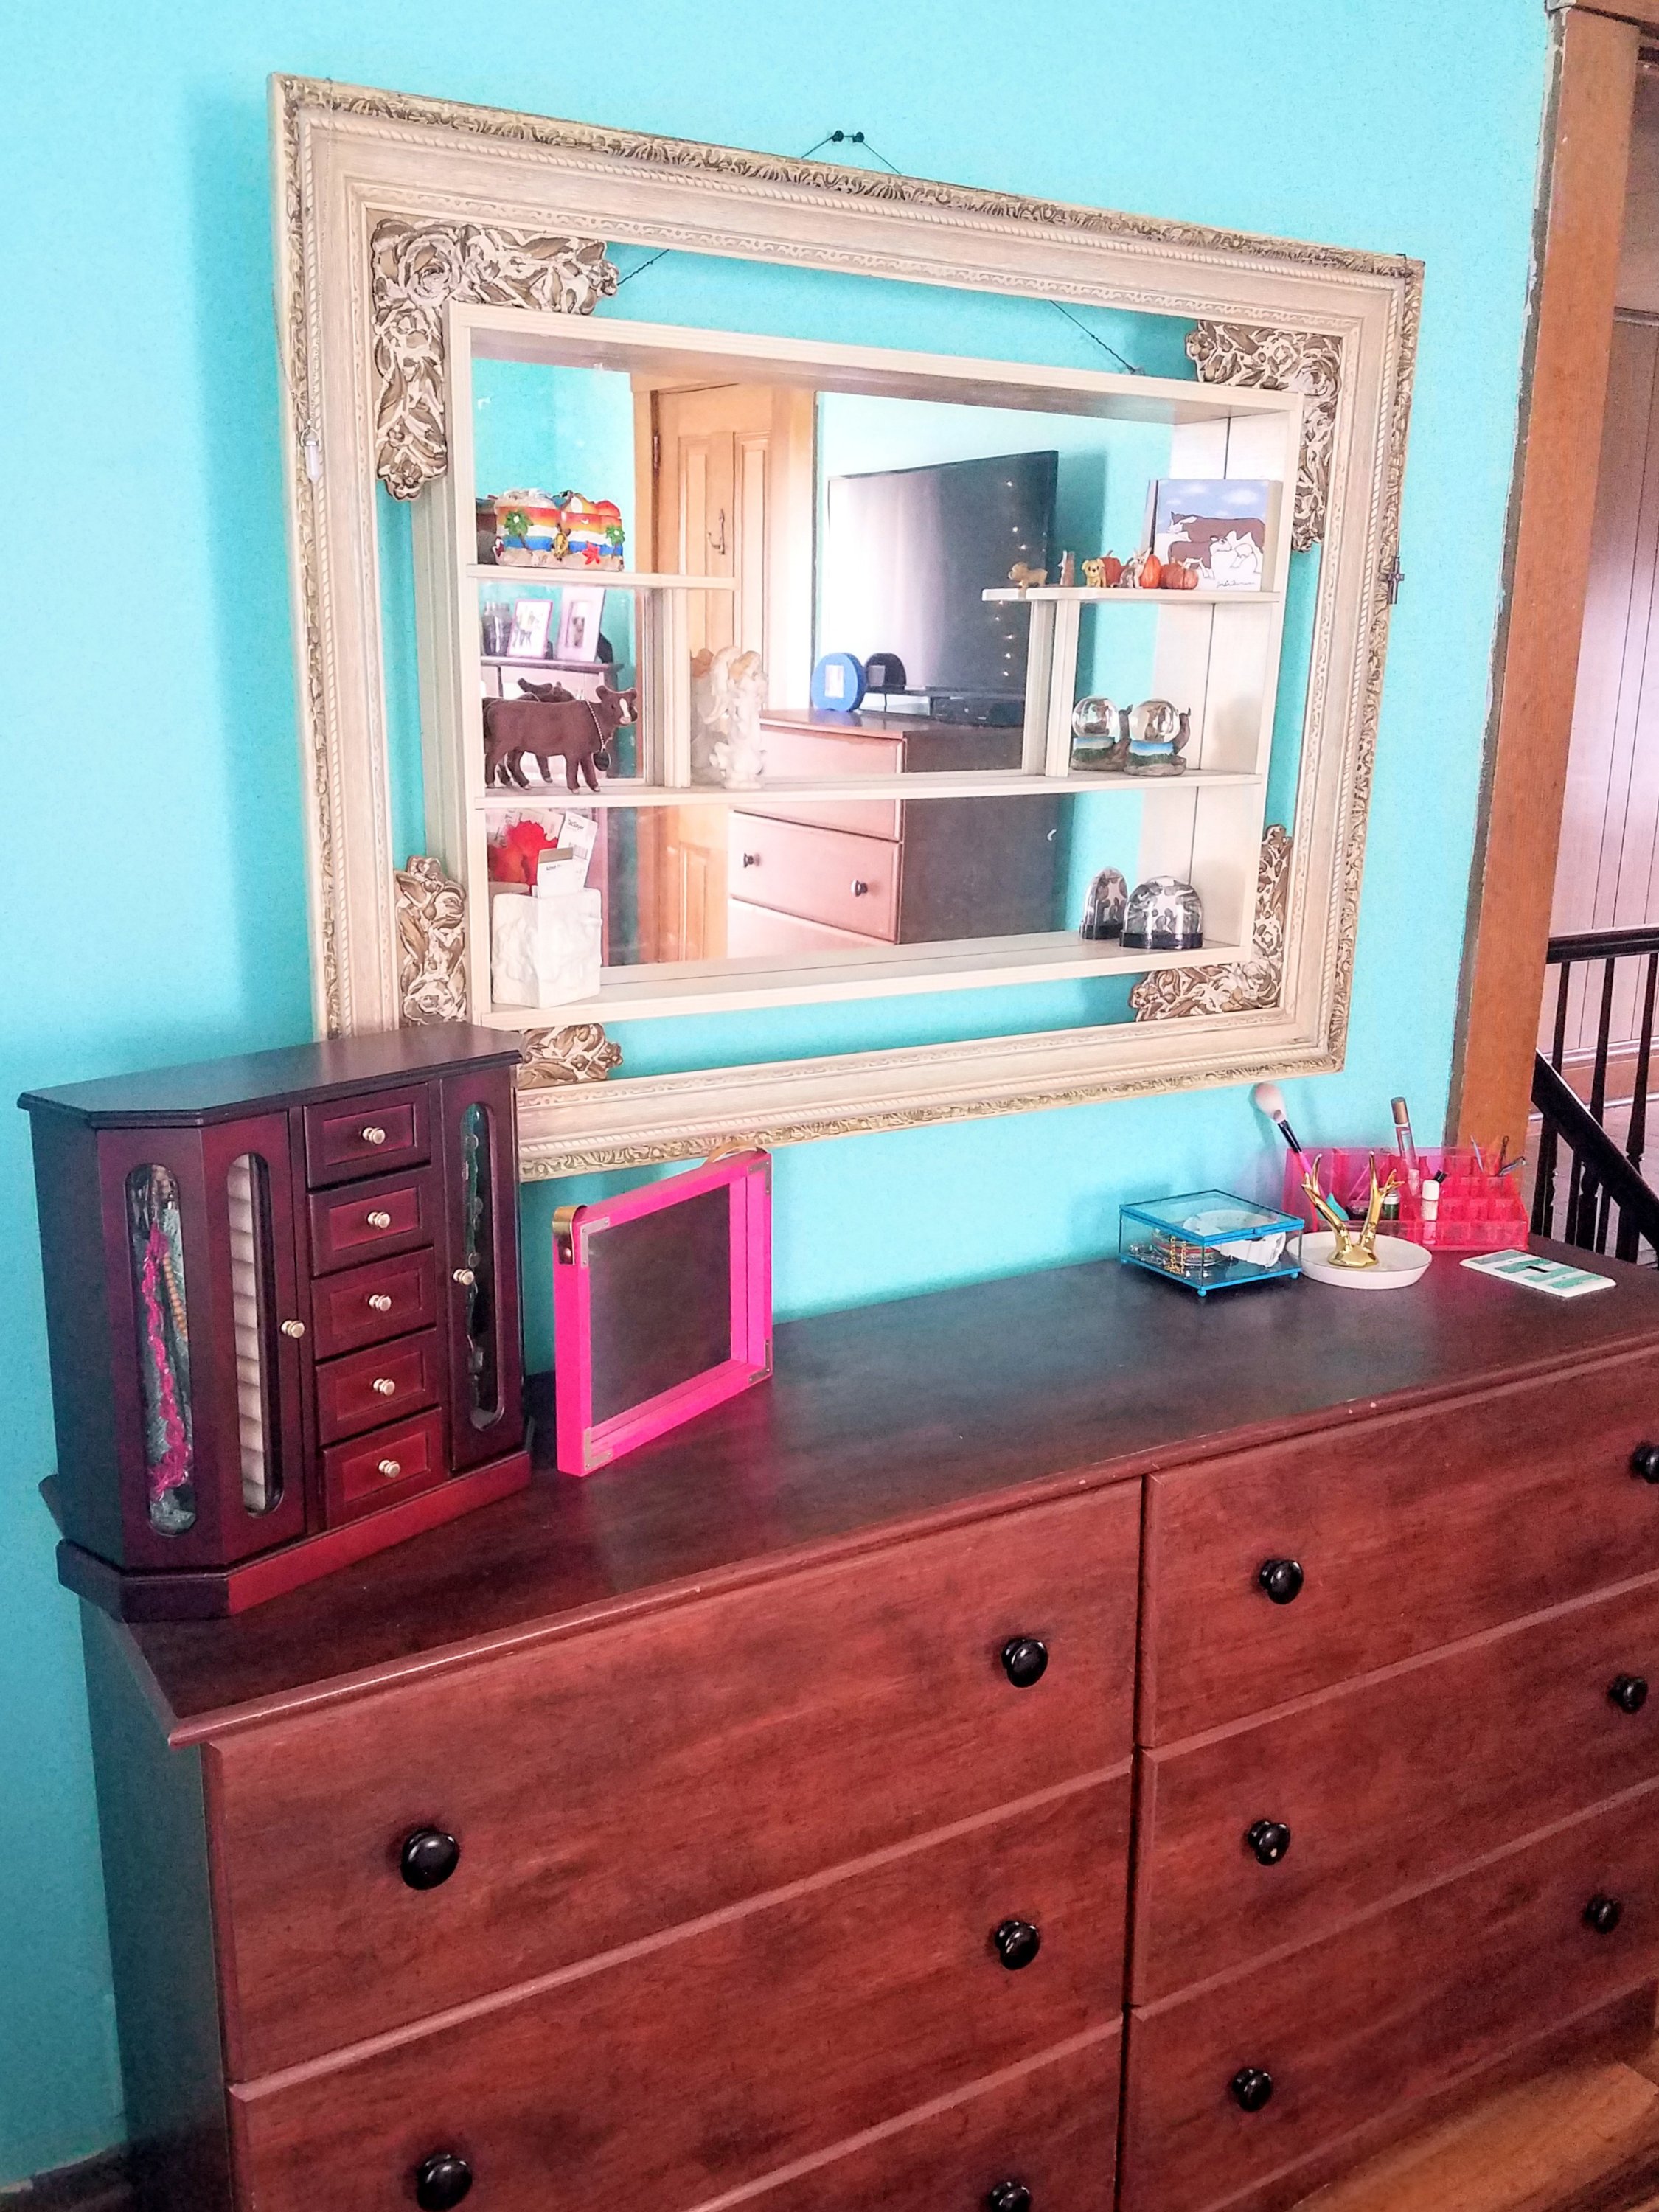
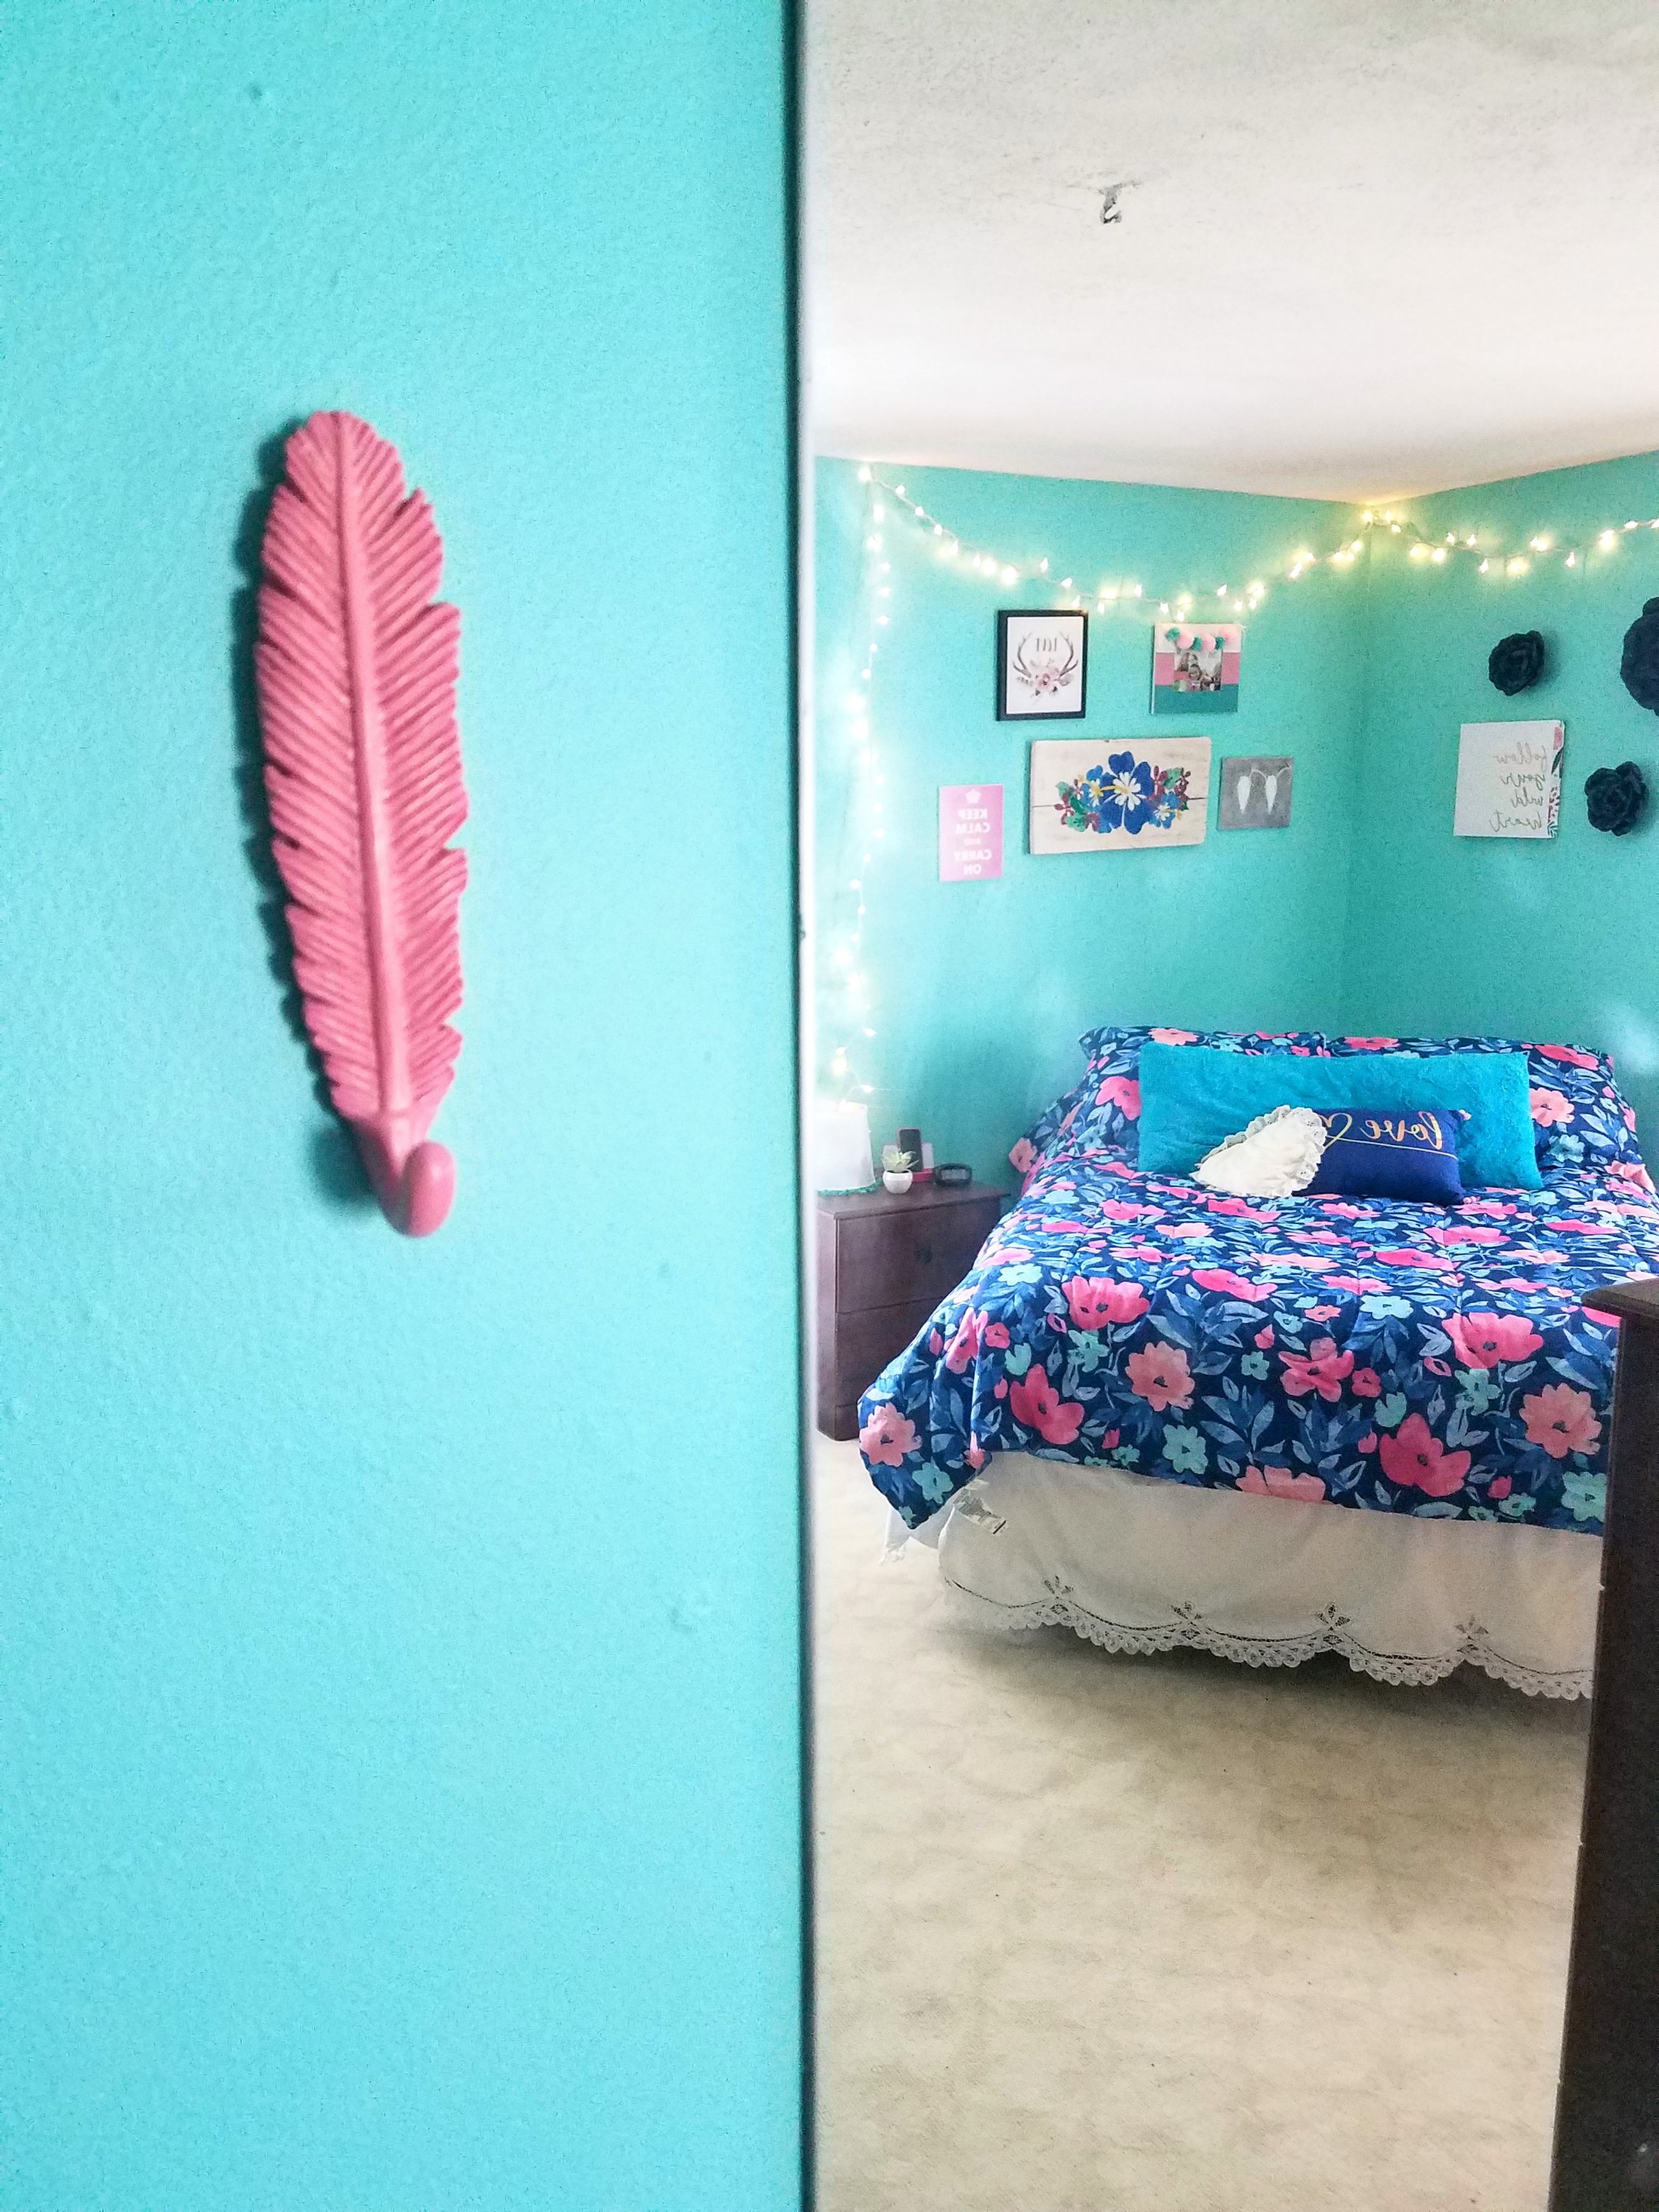
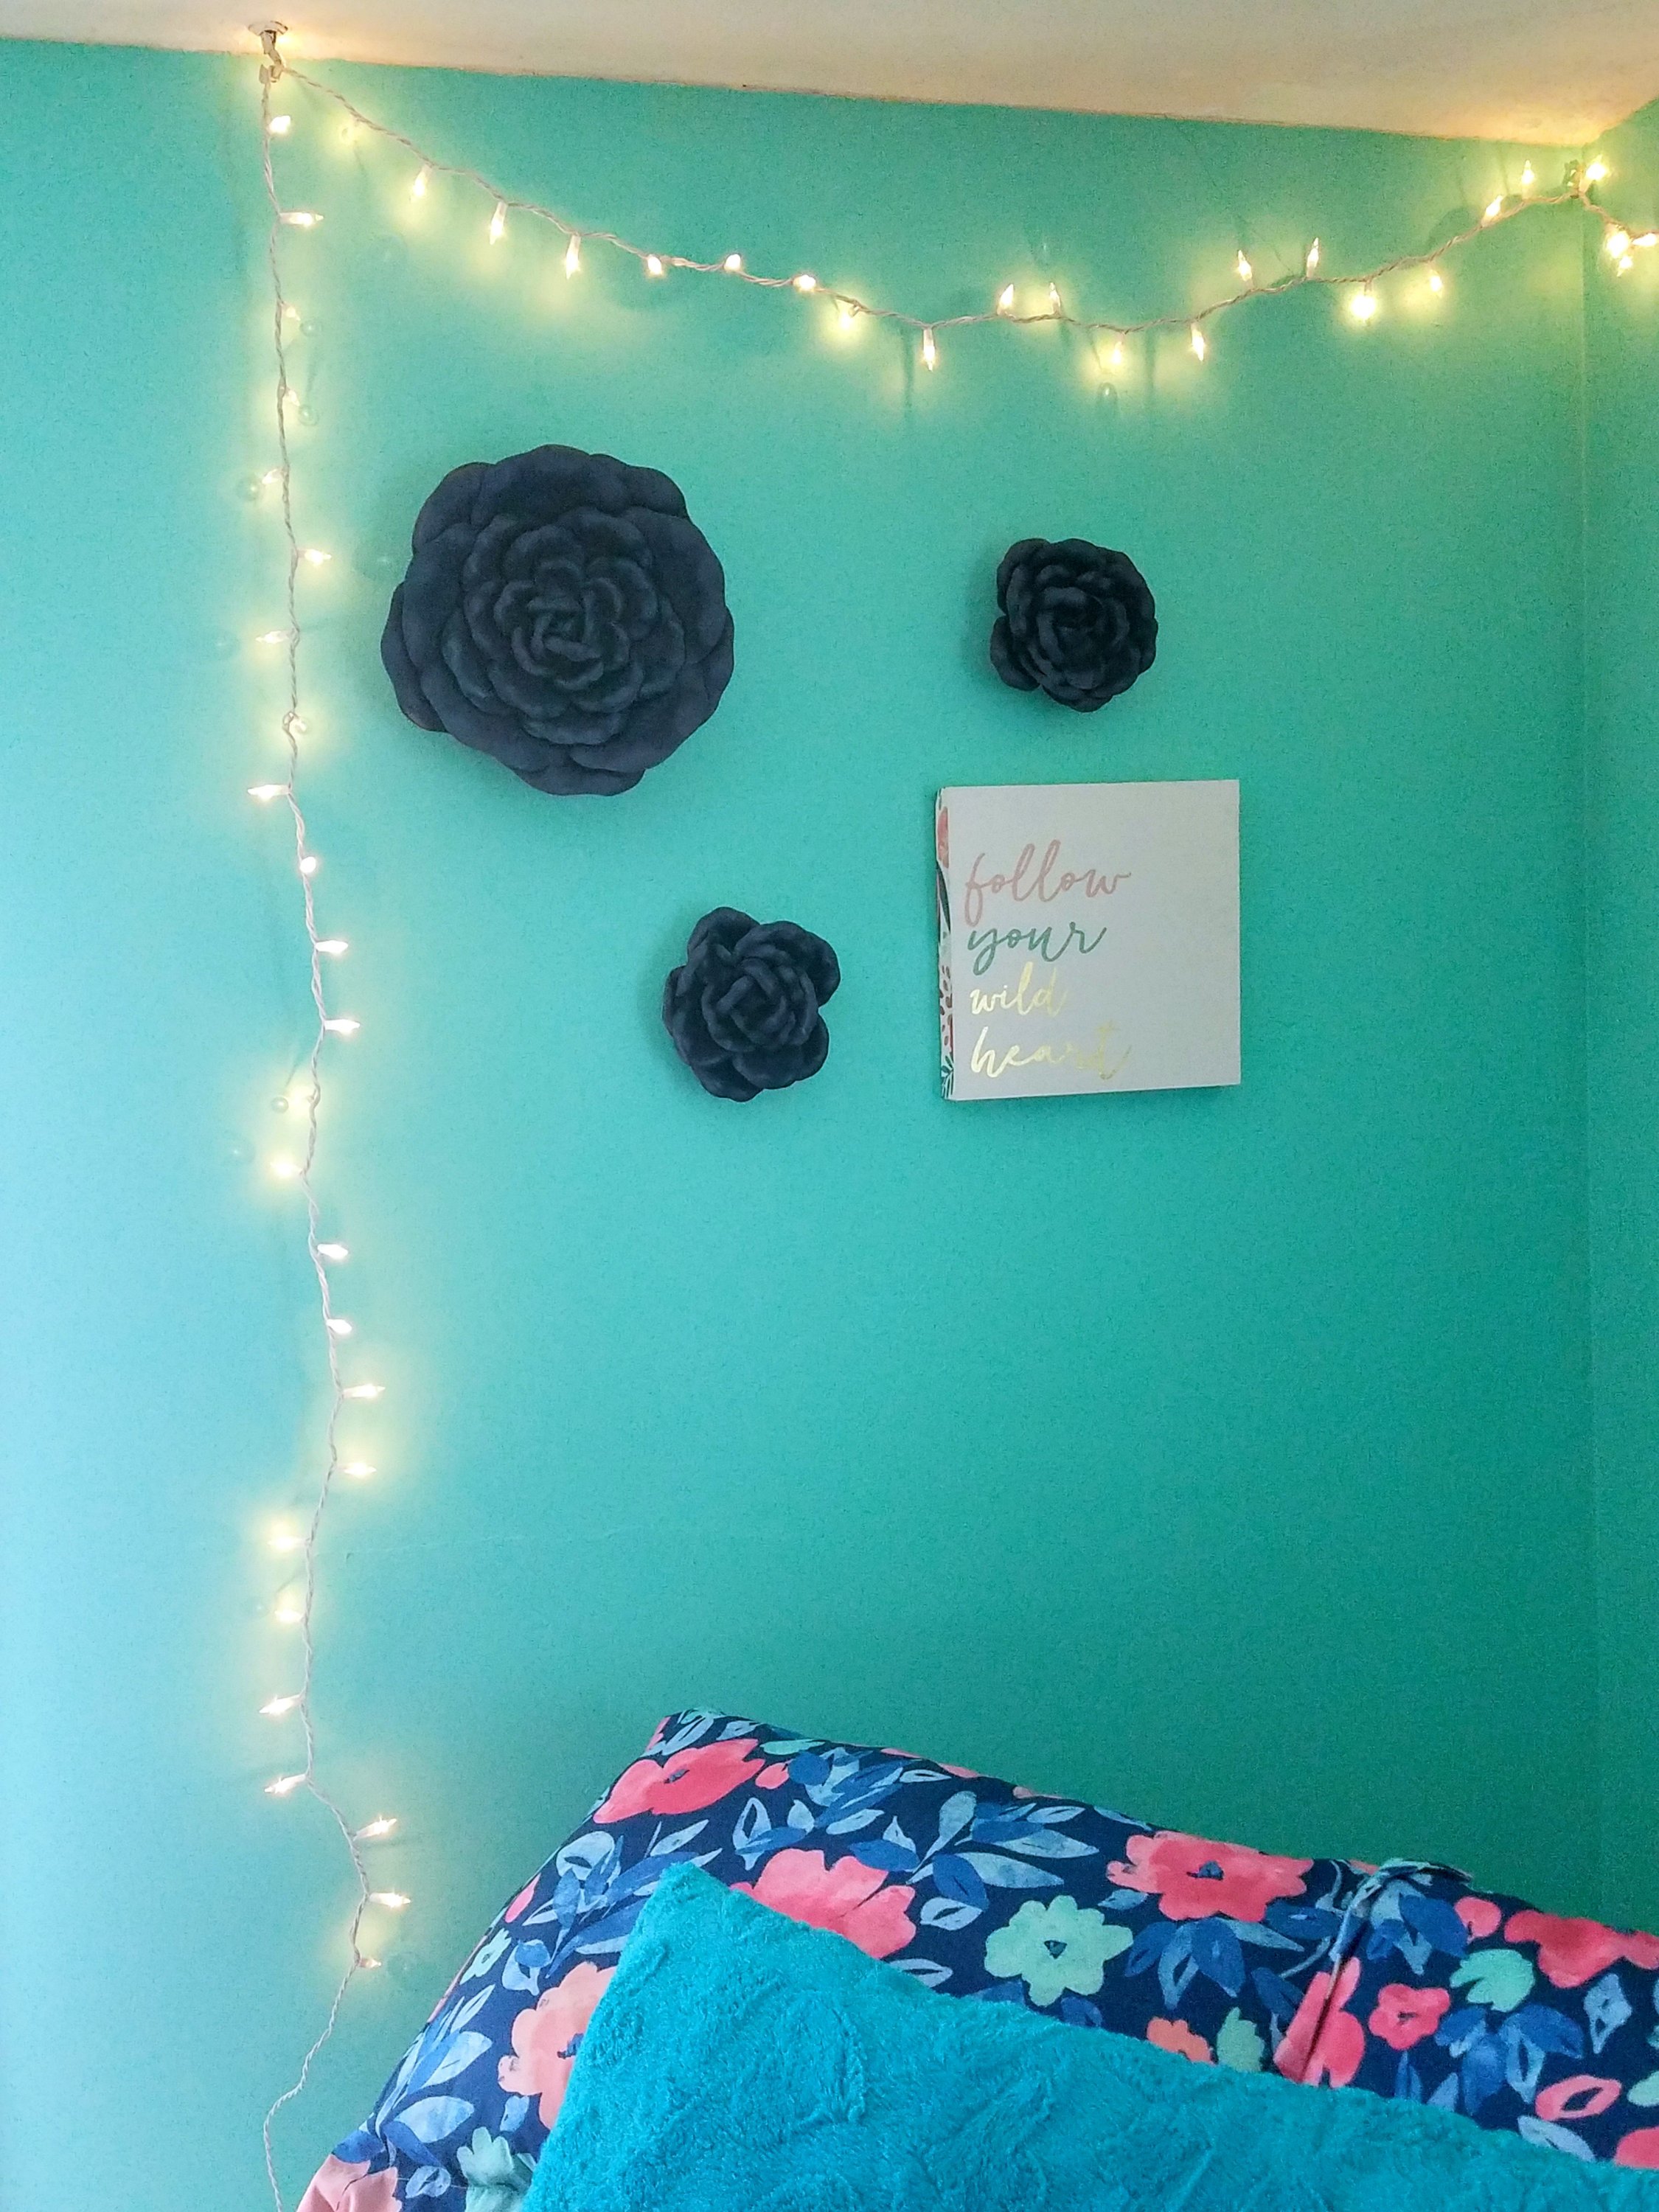
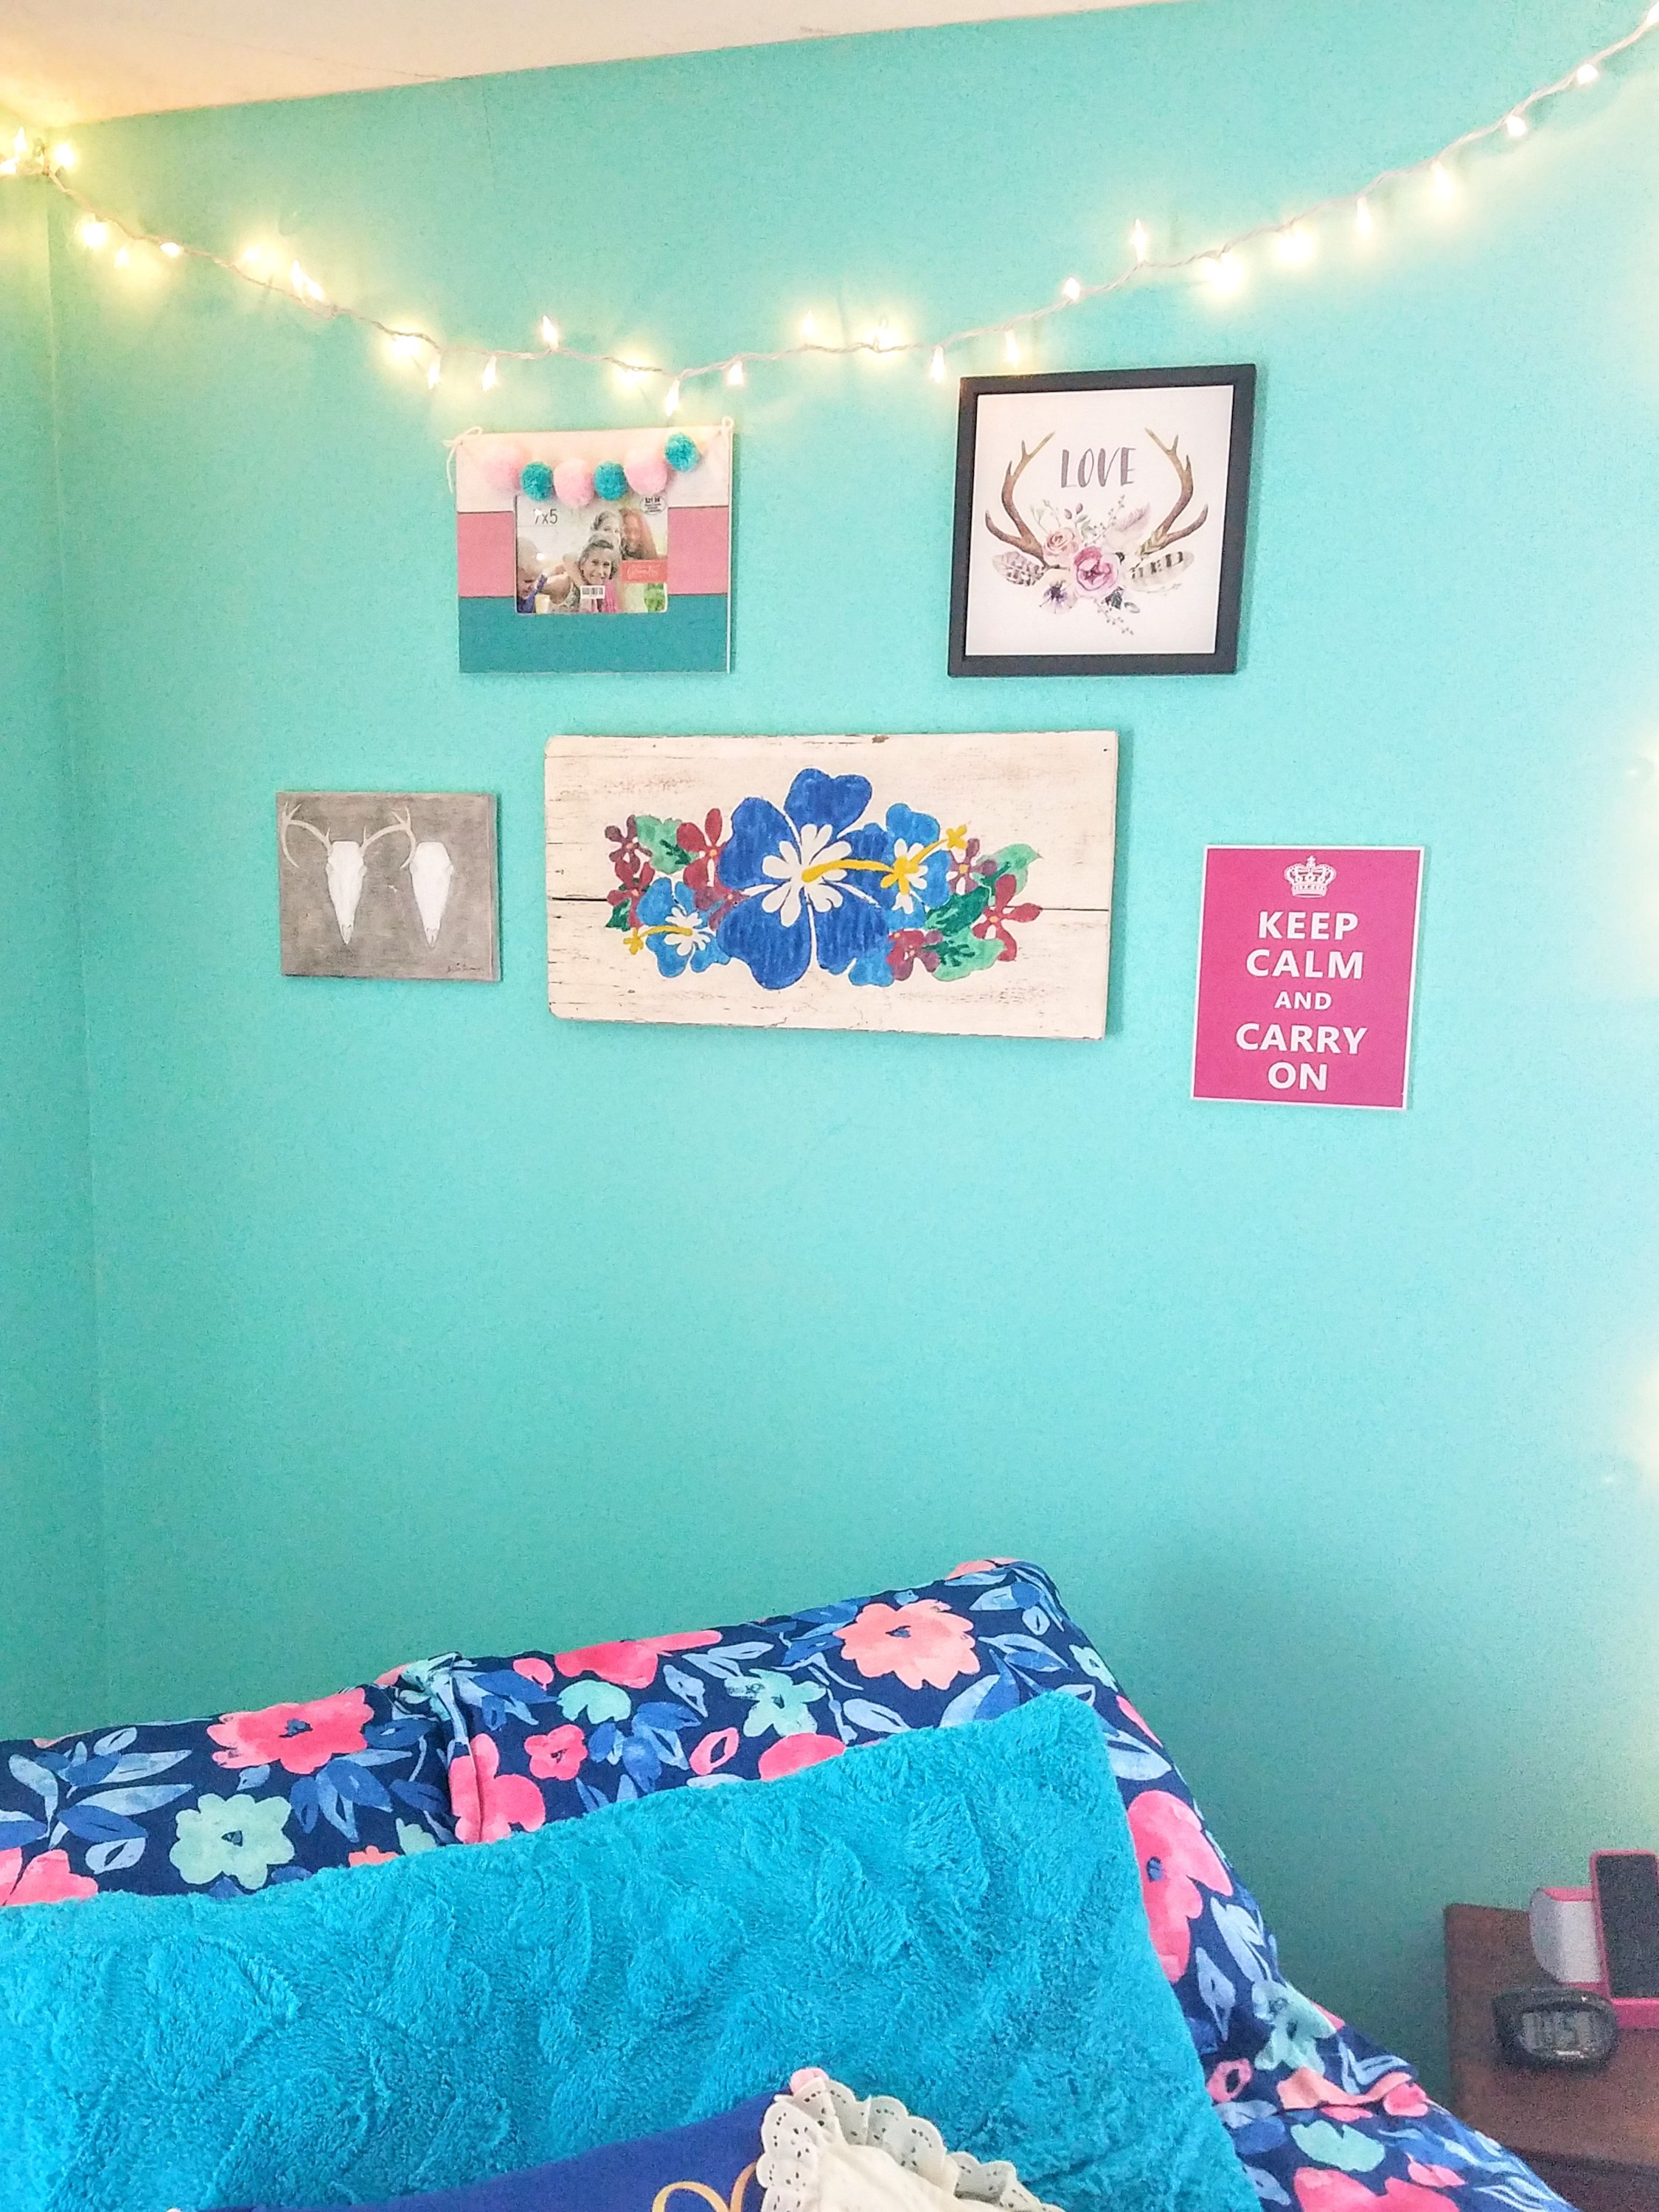
Some old, some new, plenty of Hobby Lobby help. She wanted a little girly and a little rustic. She also wanted “fairy lights” so fairy lights she got.
We can’t change the brown furniture (it was her grandmas), and new carpet isn’t going to happen just yet, so working with what you’ve got sometimes has to just work… but…
Truly I love how it turned out. Dont tell her but Santa is thinking about a rug and a chandelier, along with new knobs for the drawers. 😍
Trends? Psh.
It is the end of the year and every one starts rounding up the “best ofs” lists. I have been seeing a lot of lists of trend that people would either like to see more of or never see again. The lists made me ponder. I came to the conclusion that I do not care what is considered “trendy” or “in style”. I like what I like and could care less what others think. Actually, I think that I prefer things that were never in style (both clothing and home decor), because then it can never be considered out of style. Also, if I like something, it is because it speaks to me. It shouldn’t matter what list it is on. I change my mind all the time, but not based upon what other people believe is “cool”. I, personally, never fit into one category anyways, because I mix pieces from all different styles. There should be no rules when it comes to your own tastes and your own home. If you truly love it, go for it.
Whew. With that said, I will step off of my soap box and show you all a visual list of the things that I have loved this year. Not because they are trends or not, but because that was what was speaking to me this year. I hope some one can find this inspirational, but in no way am I saying go out there and copy every picture. (Would that make it a “trend”?) Here goes:
1. The first thing that I have loved this year is collections. They can be utilitarian or completely useless. To me, collections can be like art. Some people think that if objects don’t function, they just sit there taking up space, but I think they can be beautiful. Here is a group of cameras and a small group of stereos.

http://www.apartmenttherapy.com/la/look/look-framed-vintage-camera-collection-on-the-cheap-072111

Angela and Adam's Mood Change. http://www.apartmenttherapy.com/chicago/fall-colors-2008-midwest/midwest-25-angela-and-adams-mood-change-066295

Graham and David's Modern Escape. http://www.apartmenttherapy.com/la/2008-fall-colors-southwest/southwest-26-graham-davids-modern-escape-066631
3. This is a little strange for me, but this year I have love all clear, or acrylic, furniture. There are so many great pictures, but here is a gllimpse of one that I am wanting:

This one even contrasts well with the cabin decor. http://www.apartmenttherapy.com/la/look/look-modern-cabin-071787
4. No matter what anyone says, I love love love both empty frames and leaning frames. I lean frames as opposed to hanging them all the time. Against a wall, on a desk, on the floor… Just a couple examples:


Damien and Rachel's Chromatic Casa. http://www.apartmenttherapy.com/dc/fall-colors-2008-east/east-56-damien-rachels-chromatic-casa-066516?image_id=28726


6. I am loving repurposed decor and furniture. I have always been a fan of old, vintage, or antique items, but it more recently has occured to me how great it can be to repurpose some items into new things in the home. Some of my favrite ideas below:


Mail box used for laundry. Patrick's World of Wonder. http://gallery.apartmenttherapy.com/photo/121808patrick/001h

This is a vintage sign remade into a sliding door. I'm sorry, but I do not find where the image came from!
7. I am also a fan of decorating in black and white. Don’t get me wrong, I love punches of color, but black and white can make a huge statment and go with so many additional colors. Some great black and white pictures:

I'm not sure where this picture came from, but it is gorgeous!


Quick Trip To The Antique Store
Last night before the ice storm, we took a quick drive to the antique store the next town over. I love this store. All antique stores are fun, but this place is so big that you always see something new. I did find these two little gems:

A coke box with the cubbies still in. I have been wanting to hang one of these up for a trinket shelf.

This is a very old cigar box. I though this would be beautiful to hold little odds and ends.


The cigar box in the TV cubbie.


This was the spot we chose for the coke box. Don't mind those awful curtains! 🙂


The back of the box has a bit of a wierd shape, but this is a close up of the little candies if you can make them out.
End Of House Tour- The Living Room
So, I have given a quick tour through our new home at its current state. The only room left to show you is the living room. We are in this room most, and love the feel of it. The black console table was made just for me by Tony (aw). The pictures do look a little dark even though I did turn on the overhead lights, which we never use. Let me know what you think!


Console table with the shelves above it. The black chair was a project I redid.

The TV area. The TV didn't fit into the cubbie that was preexisting, so we just decorated the cubbie and put the TV below.

The close up of the TV cubbie. I love the little antique picture. In the small jar is also small little glass candies. I need to find a better place for them.

These old movie theater seats were a salvaged find. They sit next to the TV on the right. The vintage ad above matches them so well.

The other side of the TV. We love our movie display. Again, I love anything with cubbies, so this was perfect for me!

The couch is directly facing the TV. We still want to replace those flowery curtains, but the couch is comfy and cute- we got lucky for a hand-me-down!

Next to the couch is my pride and joy! My Eames era lounge chair!

My Baby!

I Love Cubbies
I can’t help it. I just do. I love cubbies. Or pigeon holes. I always have. It just feels like there is so much possibility for little hidden treasures. Or something like that in my grown-up house. I am on the hunt for some sort of funky retro display storage peice for my kitchen. I was thinking some sort of mail sorter or even a group of mail boxes. Or, maybe a library crad catalog would work. Or… there’s always something else. I have been hunting, so if you have any suggestions…maybe something like this:


Apartment Therapy featured this picture from Bits and Bobbins. http://bitsandbobbins.com/
Next Comes The Bathroom and Master Bedroom

This is the bed. Matching side tables and lamps.

A close up view of the side table. This one happens to be Tony's.

This is the dresser facing the bed. An old full length miror stands against the wall and an Asian keepsake box sits on the floor next to it.The dresser is vintage from when my mom was a little girl. She used the room set and then I did when I was little. The black strips are removable, and flip over to change colors. We painted one side of each black.


The hand is a vintage glove mold, the box is an old Kodak box, which we keep our momentos in. The mirror is an antique medicine cabinet, which we painted black and added a chendelier crystal for a pull. Close up of sink and storage.

The view from the door into the tiny bathroom. It feels really bright and spa-ish because of the light blue walls and white curtains. We added a blue rug and blue curtain hooks.

The little shelf we hung across from the toilet with pretty perfume bottles on it. The only little "extra" that fits into the space!

Close up of sink and storage. Pretty much the entire bathroom.
Here’s A Question…

Here is the desk and the huge wall. The one picture is hung, but the other two are waiting to be framed.
